If you didn’t catch it on our homepage, we’ve just released brand new iPhone cases as of today, and it got me thinking… I get asked all the time about my photography editing techniques both with my prints and shots on Instagram, so to celebrate our newest product release I thought it would be fun to answer some of those questions. Or, to be more specific, today I’m sharing my go-to editing steps for iPhone photos that you can do right on your own phone!
As you can probably tell by my @GrayMalin account on Instagram, I love vivid colors and snaps with a lot of personality, but also favor a very “clean” look that pops off of the page. If you’re interested in knowing just how I achieve that look, then keep reading for my secrets to creating gorgeous, high quality iPhone photos to share on social media. Enjoy…

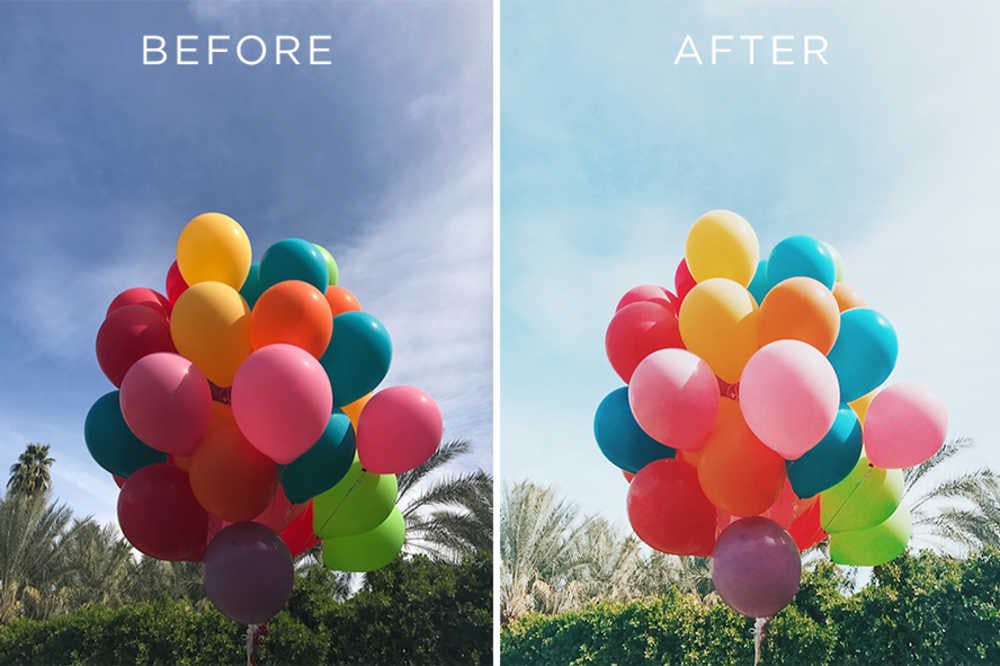
1. Create a Clean Foundation
The key to achieving a clean and professional look in your photos all starts with the background. If it is too cluttered or includes distracting elements, then you’ll want to remove them before you even jump into color correction. I always start by importing my image into Facetune (which, believe it or not, is super useful for editing more than just faces!), and then clean up the photo by removing unwanted things in the background using the patch tool. Next, I use the reshape tool to push in any unwanted features for an even cleaner image.

2. Focus on Filters
While I don’t like to “over-filter” my photos, using filters is obviously an easy way to correct colors and create the exact mood you’re going for. After I’ve cleaned up the background of my photo, I save and import it into VSCO for coloring. For images on my @GrayMalin Instagram account, I use the filters A6 or C8 to make colors pop and give them a fresh quality.

3. Brighter is Better!
Of course, not everyone prefers to have light and bright photos (i.e. if you’re going for a moodier tone), but I personally love the fun and airy look of a bright image. Sometimes the photo is already light enough that I can skip this step, but if the image is darker than I would like, I up the exposure in the photo editing section of VSCO, and hit a final “save.” Next step: share away…

That’s it! Easier than you thought, right? I hope these tips help you create some gorgeous photos that you love, and if you have some other iPhone editing tips that I didn’t mention here I’d love for you to share them with me.

P.S. Don’t forget to shop our three new iPhone cases in the GM shop here!
xx GM