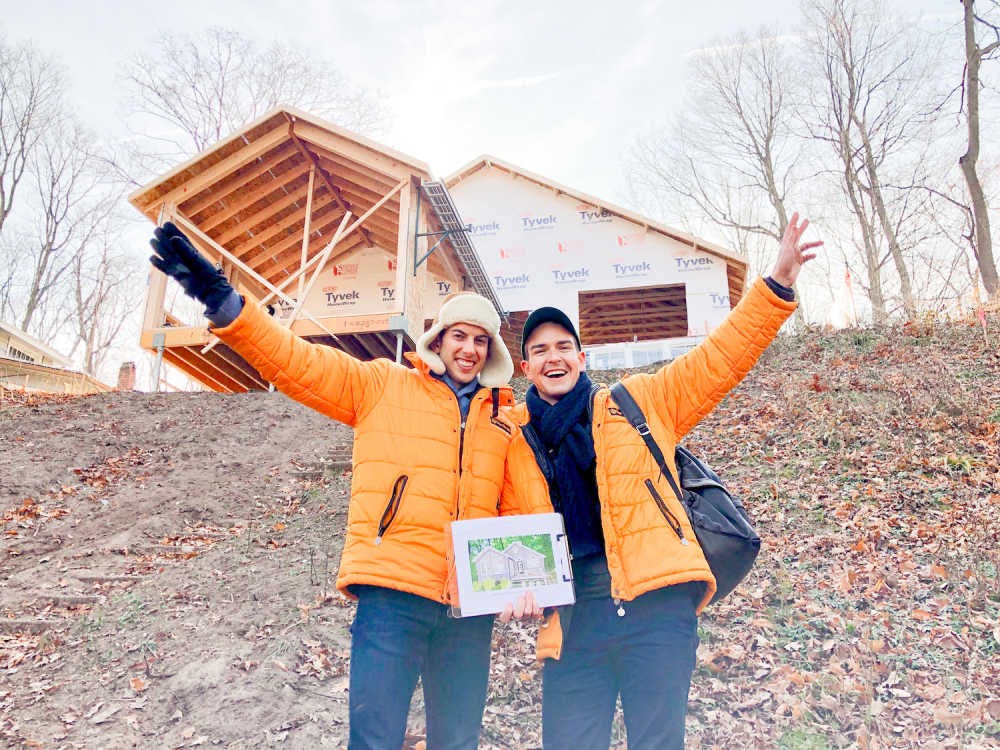
Hi Everyone,
Since we last spoke, the Lake Michigan renovation has made major strides and I’m happy to report that we’re well into Phase II of the overall process. If you’re wondering what Phase II entails, our designer Kate Lester summarizes it best: “it’s everything that doesn’t move...hardware, lighting, tiles and everything else that stays put.”
To back up a bit, Phase 2 of our renovation kicked off with the following:
Budgeting: Working with our trusted builder, Troxel Custom Homes, and designer Kate Lester, we established a realistic budget to begin and complete the project. This includes everything from permits to the final coat of paint and everything in between.
Planning/Design: We listed out, prioritized then reprioritized our needs and “really really wants,” then made decisions and most importantly, are sticking to them.
Without a complete set of plans, you can’t get a construction permit which is, of course, essential and without a complete set of drawings, mistakes will be made, so you may end hitting costly speed bumps along the way. Nothing is worse than running into problems that could have been avoided, right? Considering we are primarily overseeing this project from a distance; this rule of thumb was especially important.
.jpg-VKdGZPE)
Now back to the “everything that doesn’t move,” portion of the story. Phase II pretty much entails all of the heavy lifting, so let’s roll up our sleeves and begin!
PHASE 2:
At this point in the process, construction begins and there is no turning back, so as a quick reference, here is everything that it entails:
Structure
Roof
Foundation
Electrical
Plumbing
Heating
Doors and Windows
To refresh, the previous owner removed the original cedar piling foundation in the 1990s and replaced it with a new concrete foundation. Considering the location already came with its own set of challenges combined with stricter building requirements of today, the decision was made to keep this new lower level intact.
As for the rest of the house…. it was completely demolished.
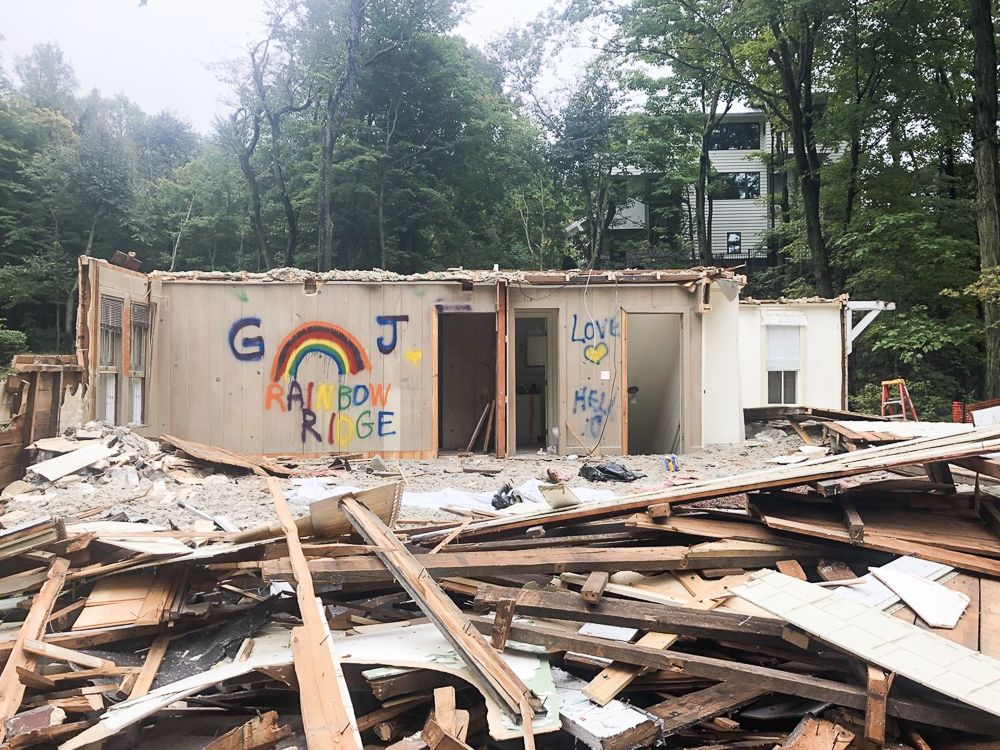
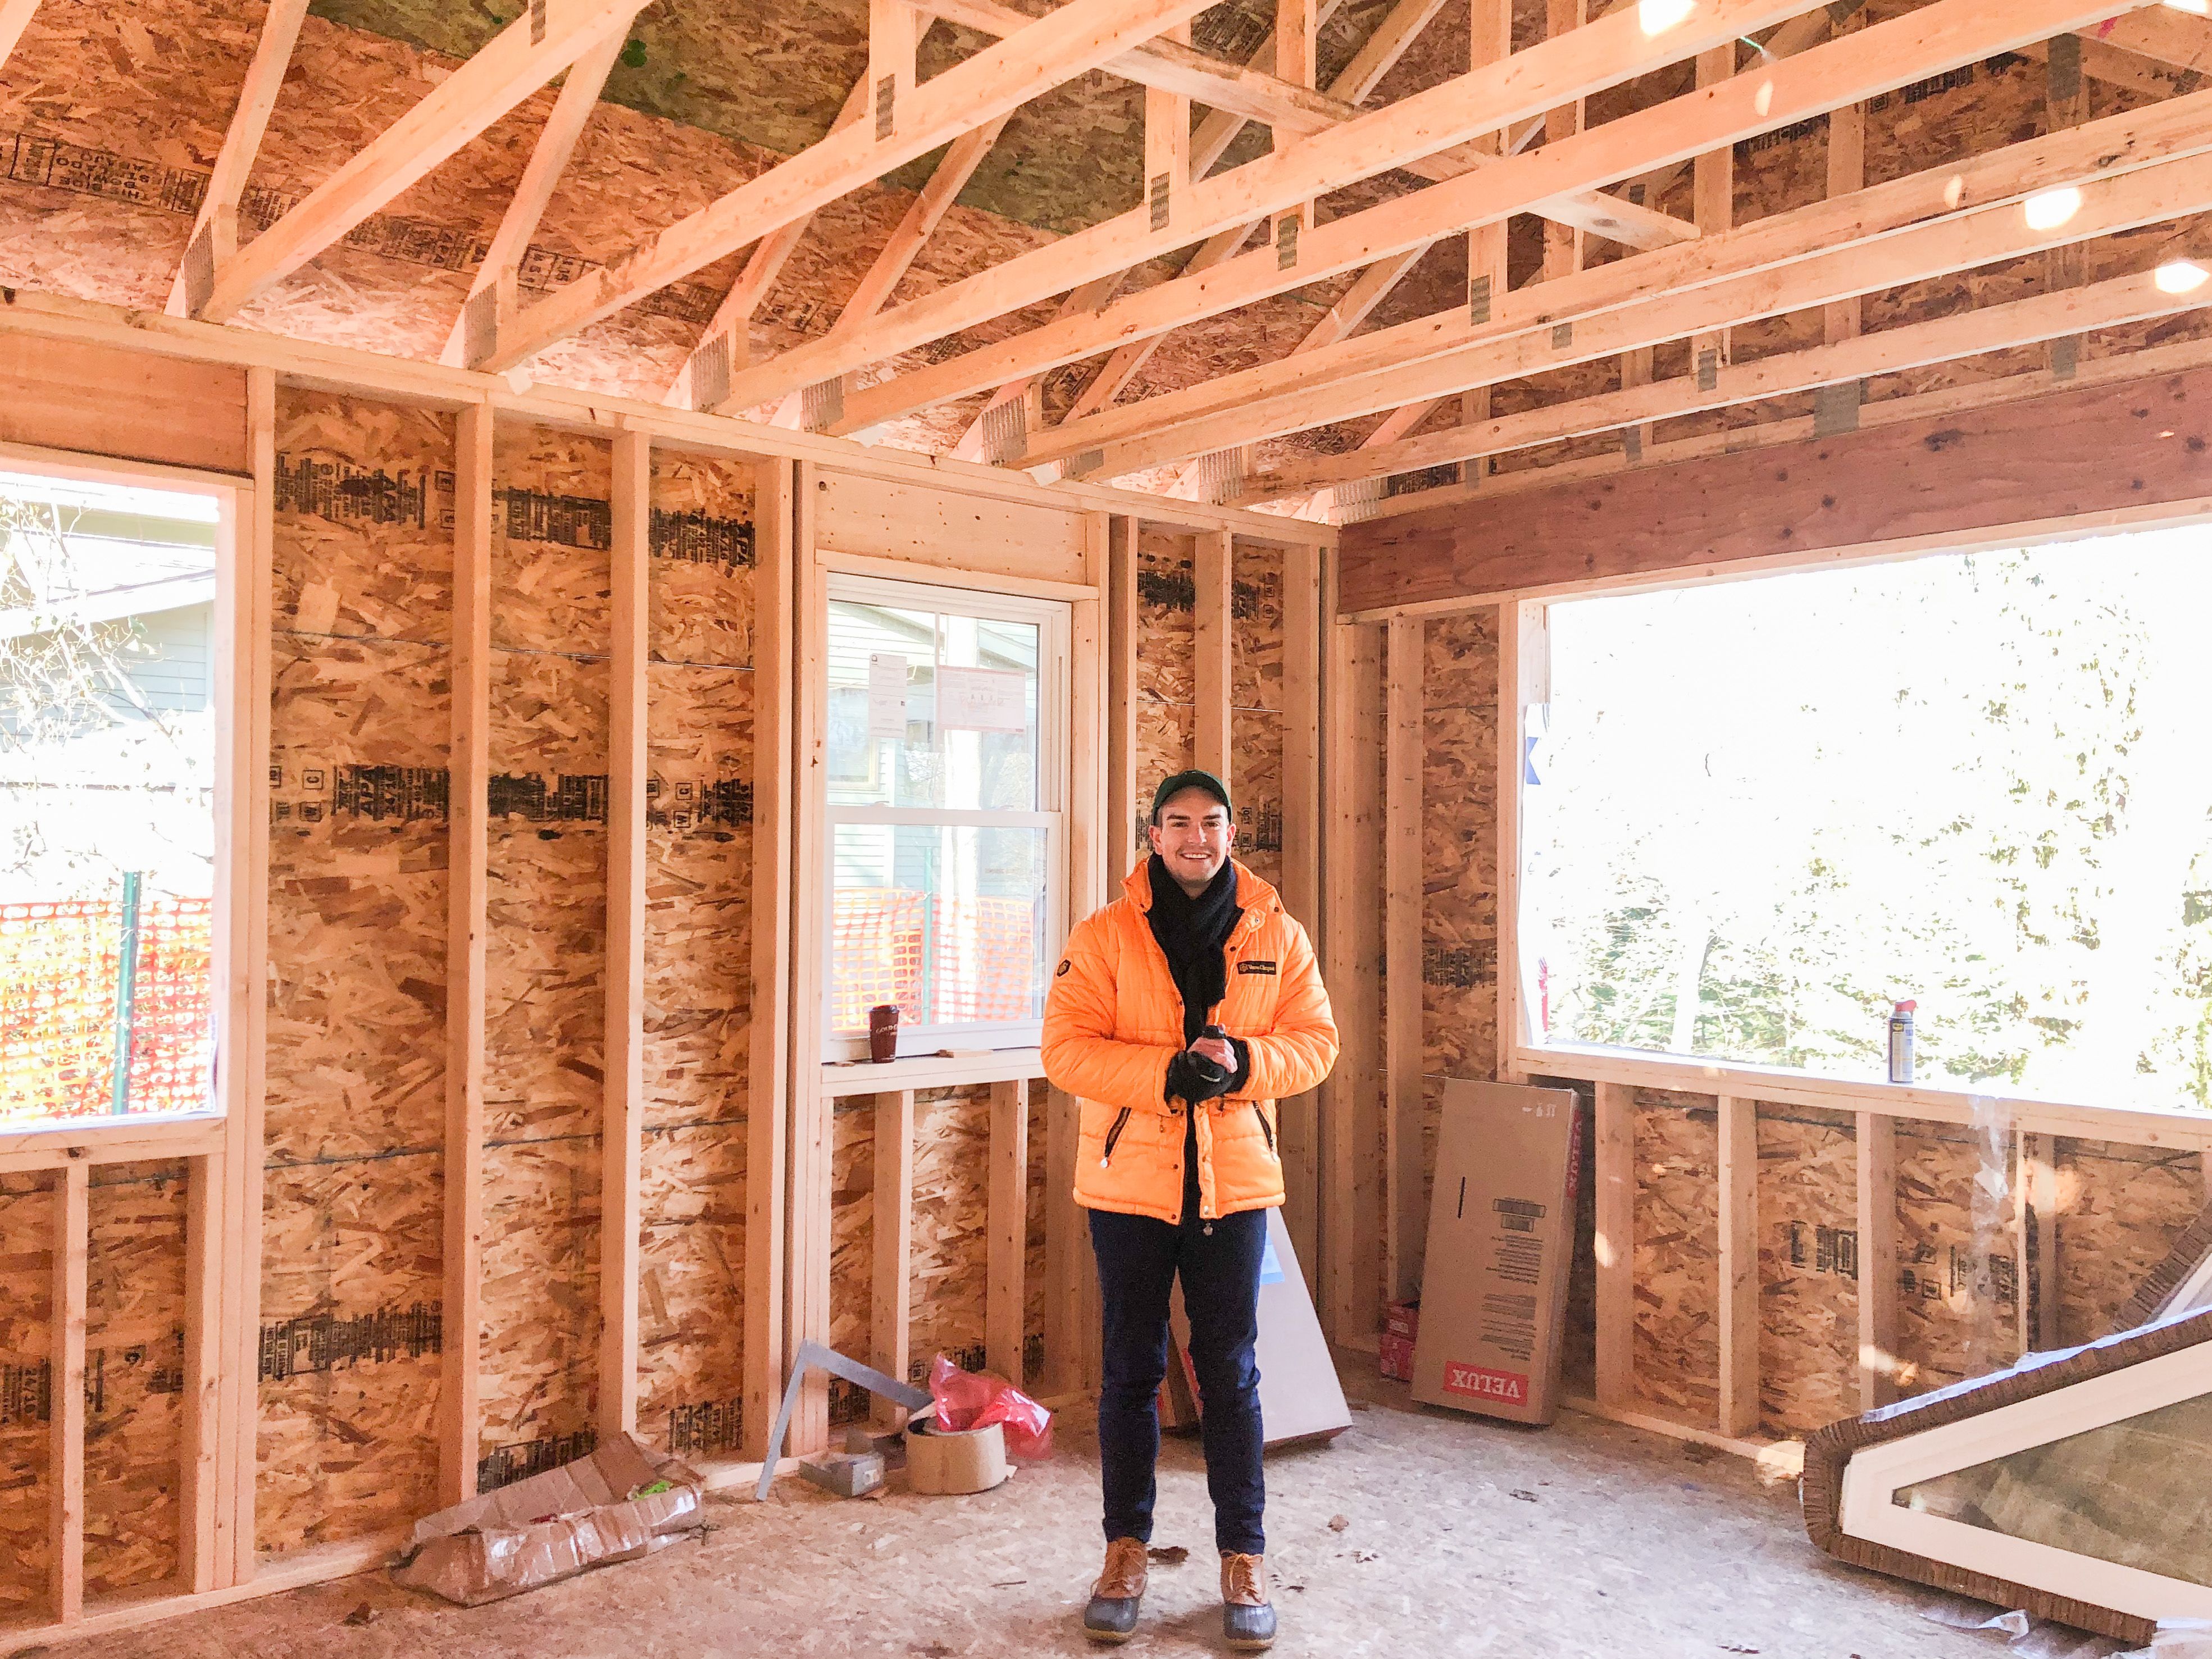
With everything cleaned out and primed to build, the work really began. A new roof was built along with reinforced beams and newly constructed windows for better insulation. Walls were removed and reconstructed in new locations in order to create an open floor plan, yet still, maintain a lot of the original foundation.
Once the framing is in, all the pipes, ducts, and wires are able to be run throughout the house. This is also when various inspectors will come in to verify that everything is up to code.
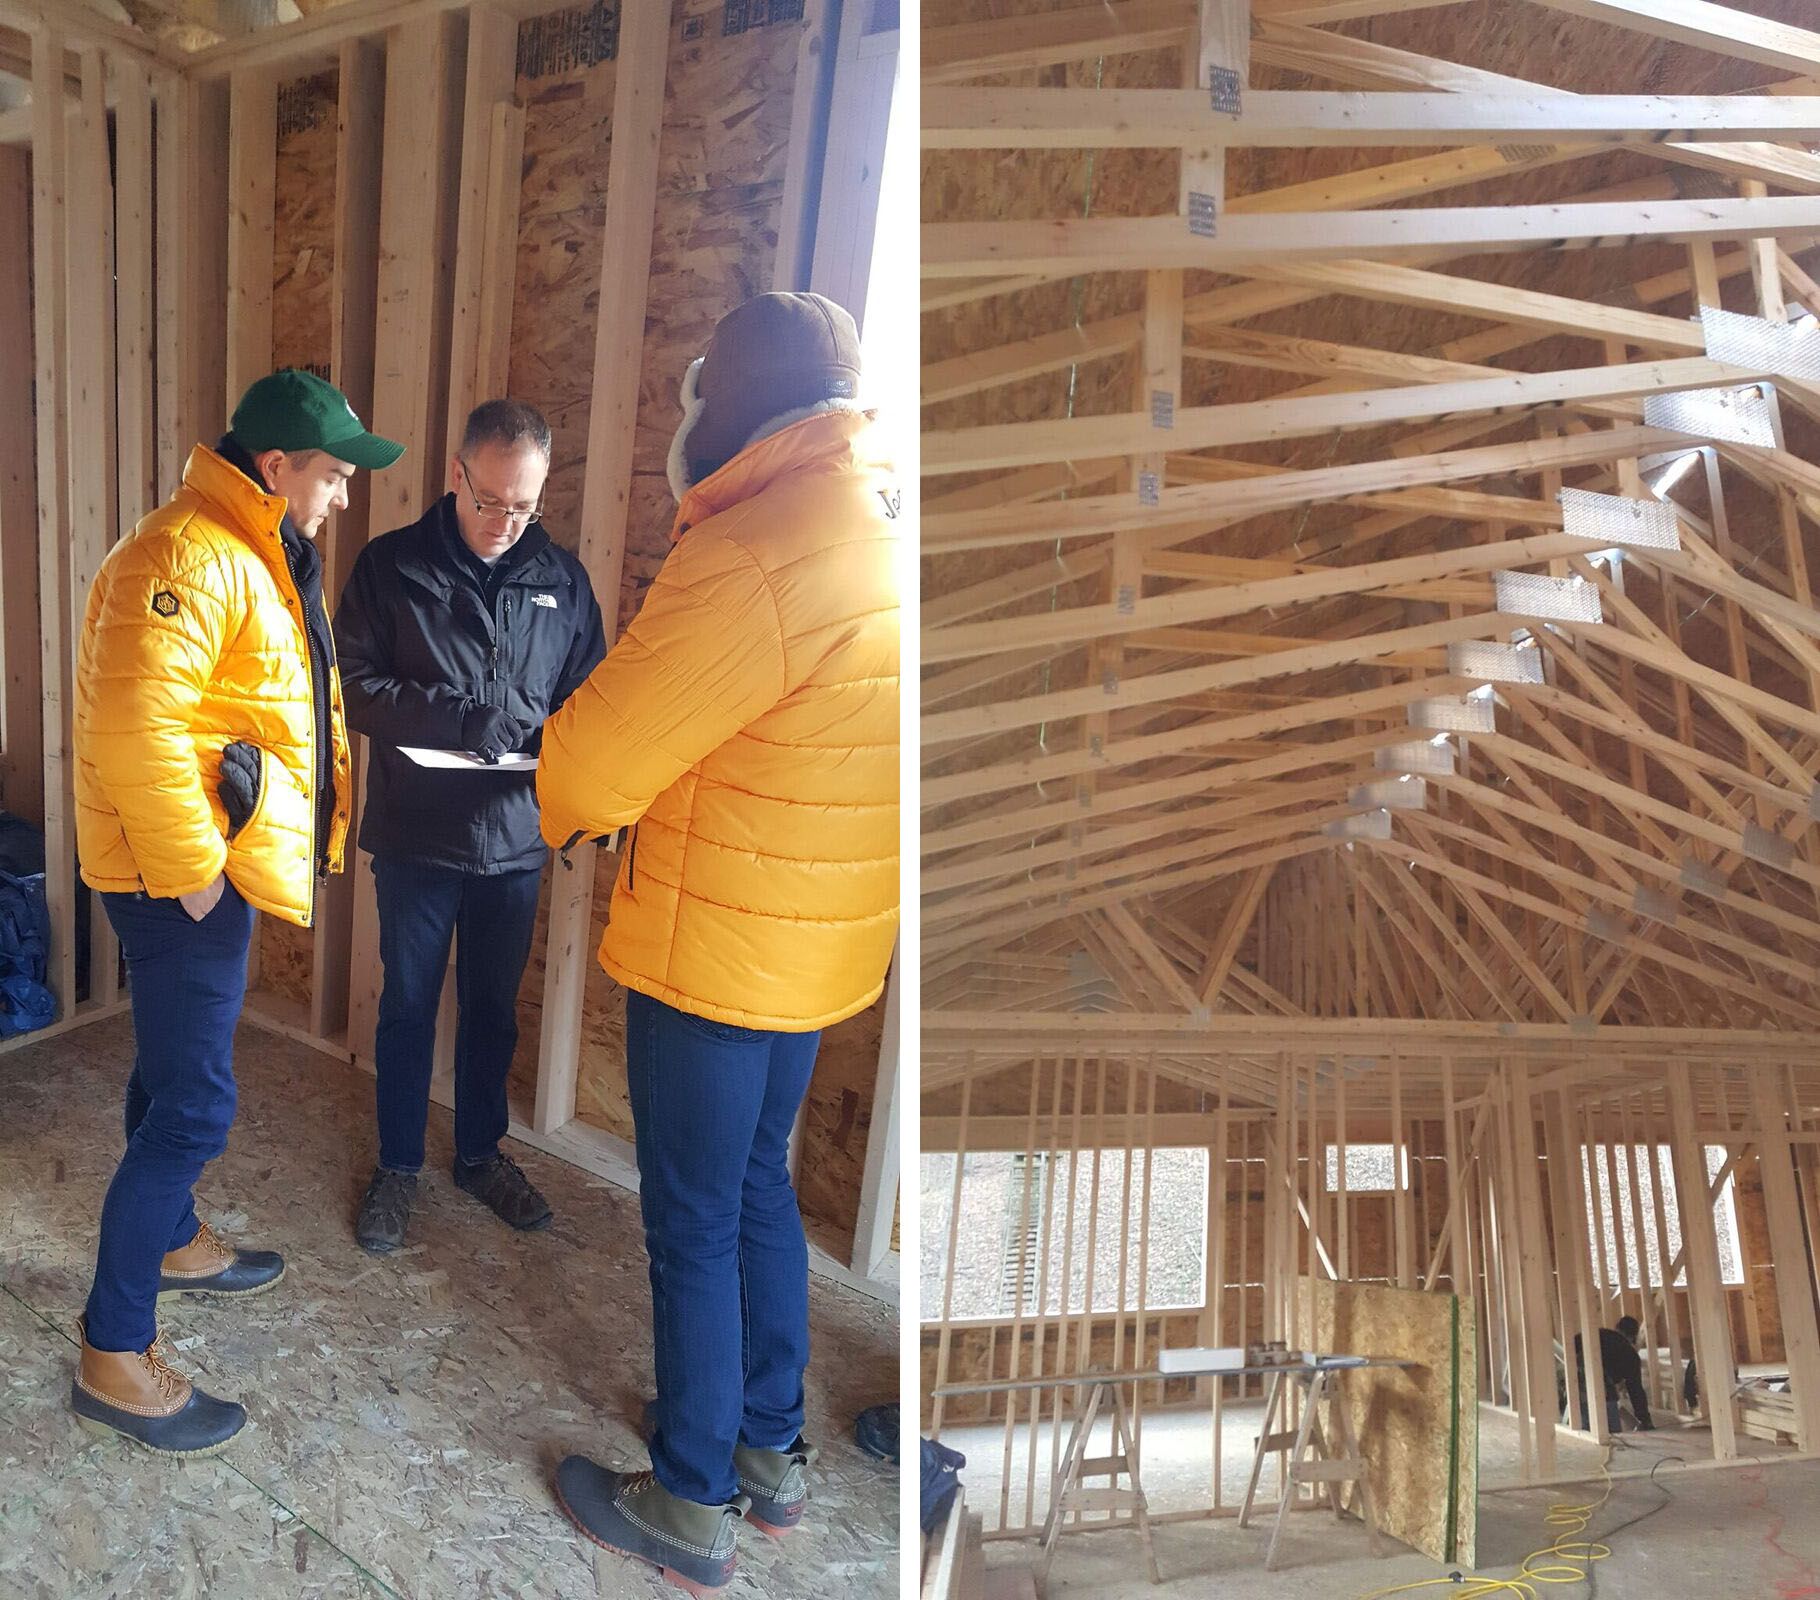
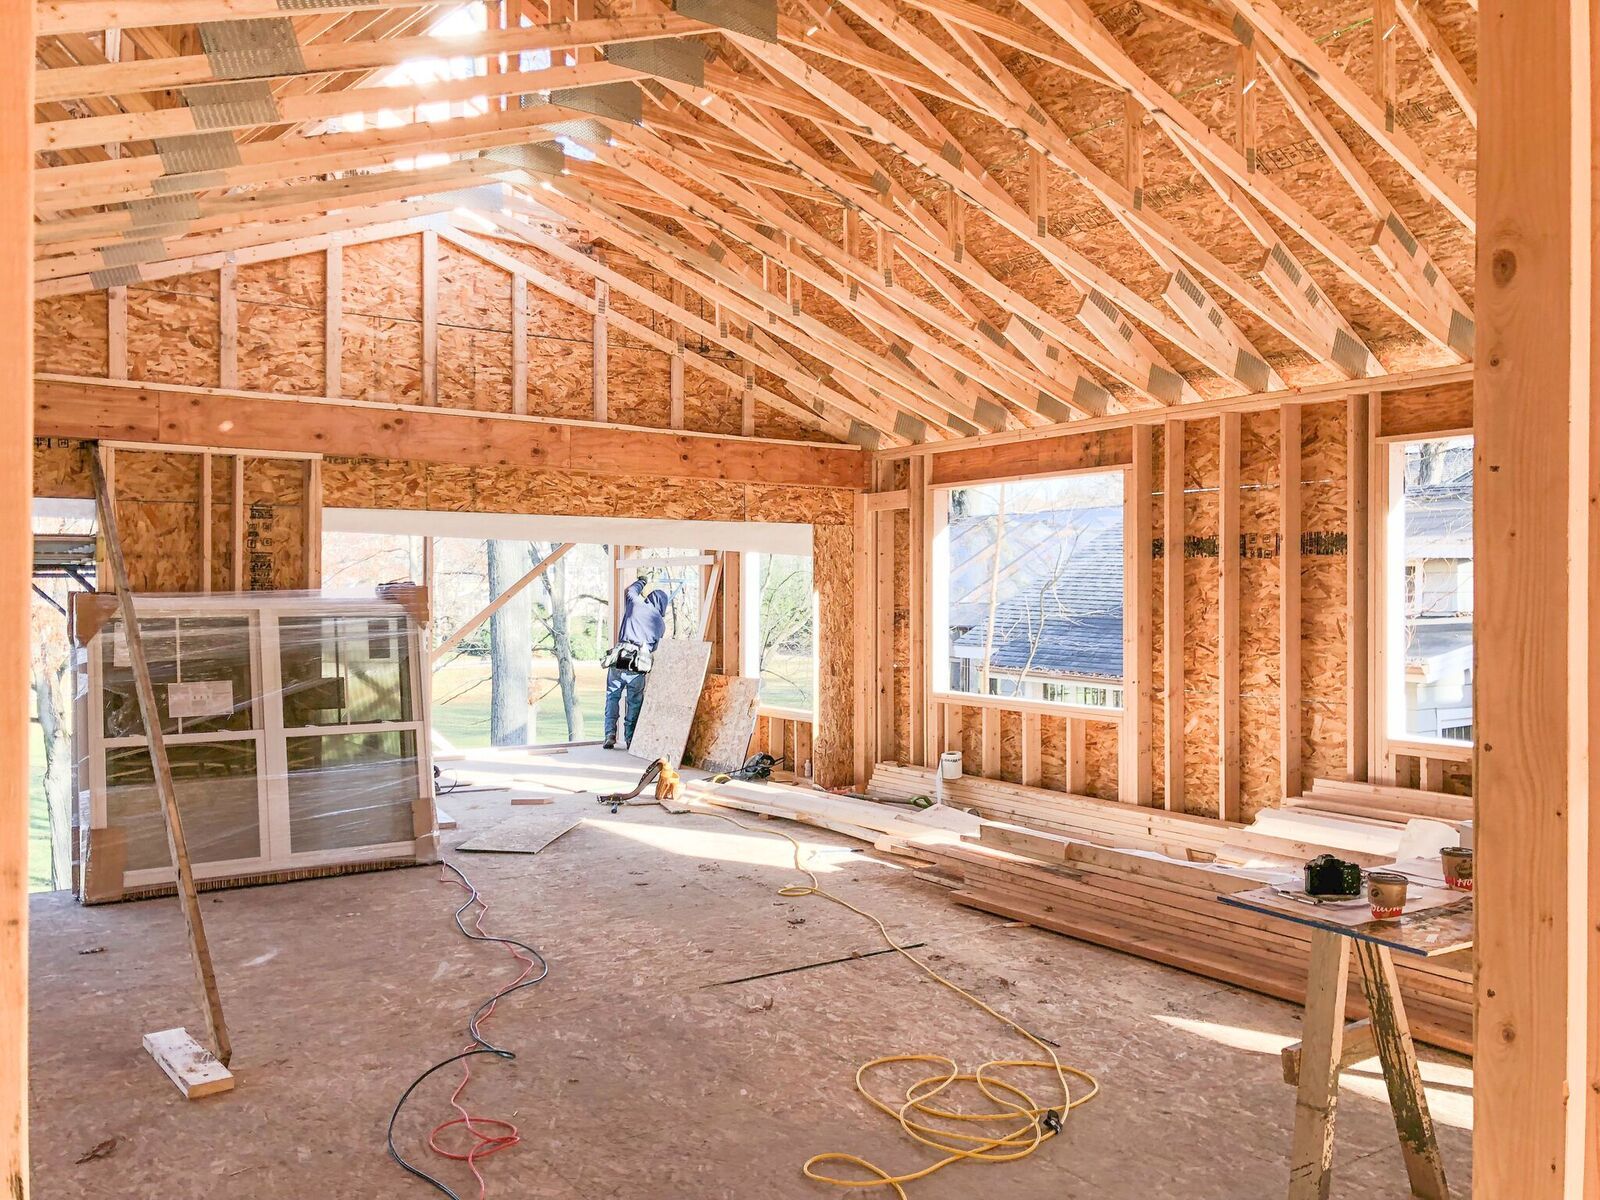
With the inspections complete for now, it’s time to install central heating and air conditioning along with running new electrical and plumbing systems. Insulation, air sealing, window installation, and drywalling happen next. I found this part to be especially exciting as I was able to reflect on everything that has been accomplished thus far, as well as envision what’s to come.
.jpg-wv7clg8)
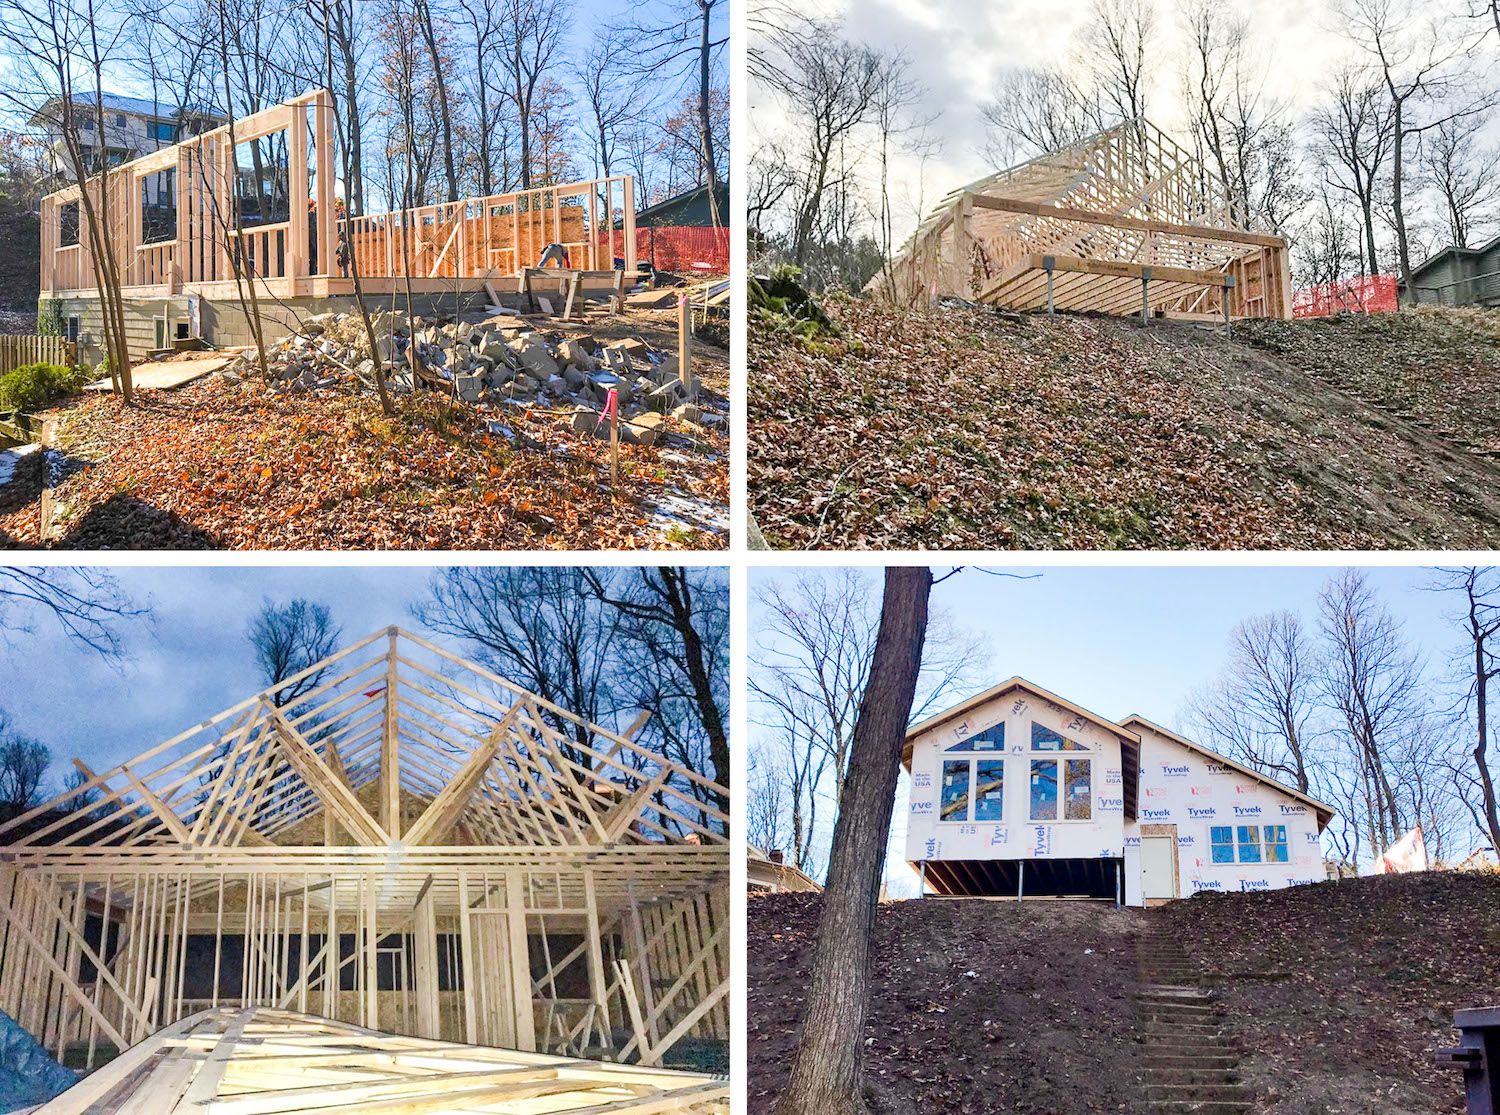
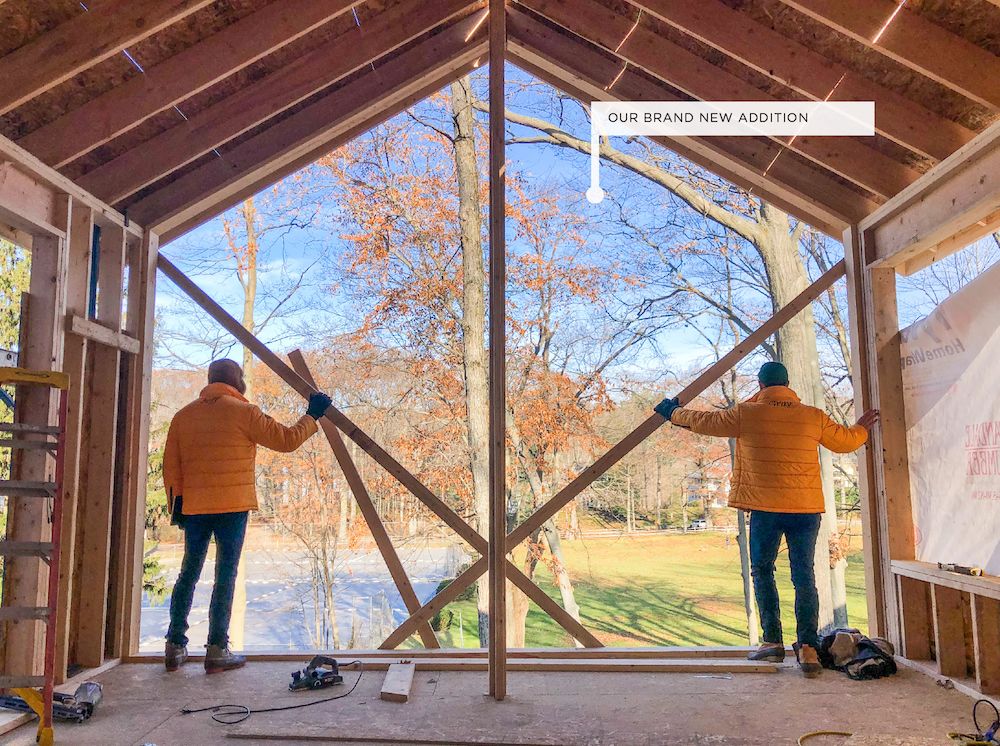
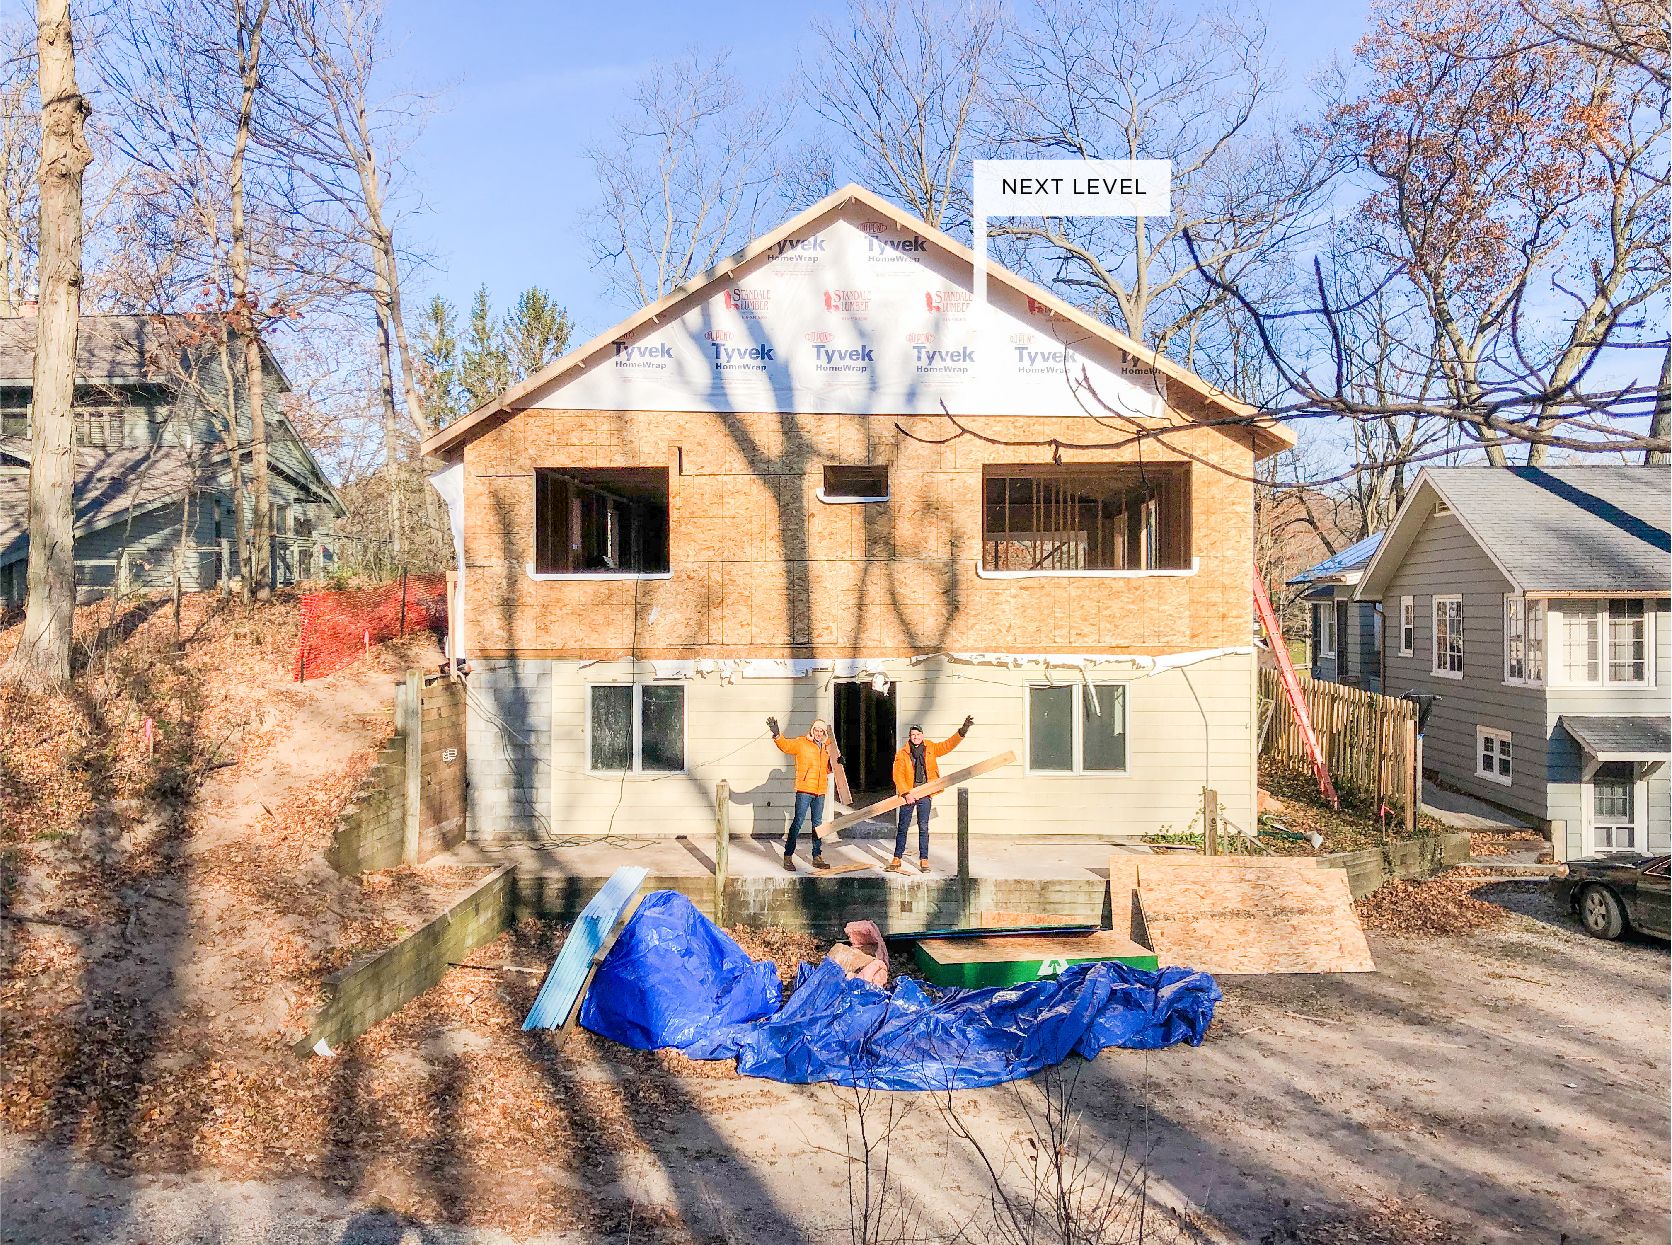
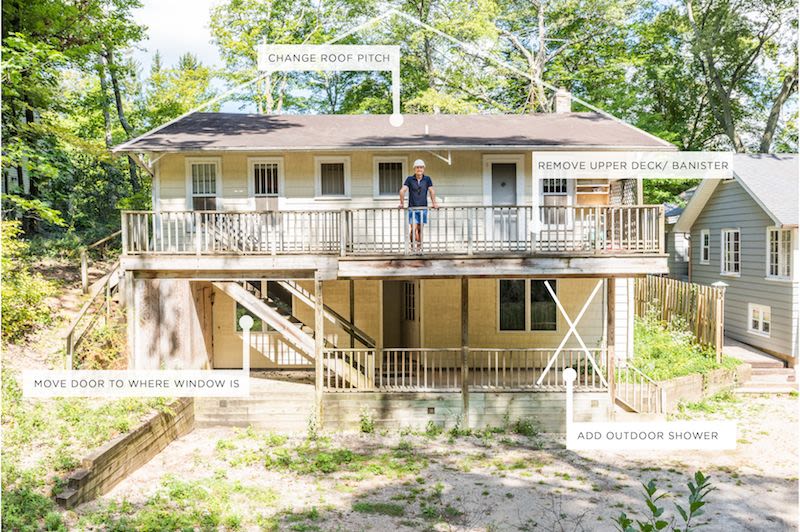
Starting with the front exterior, we have added a new addition…
.jpg-aTFVGnI)
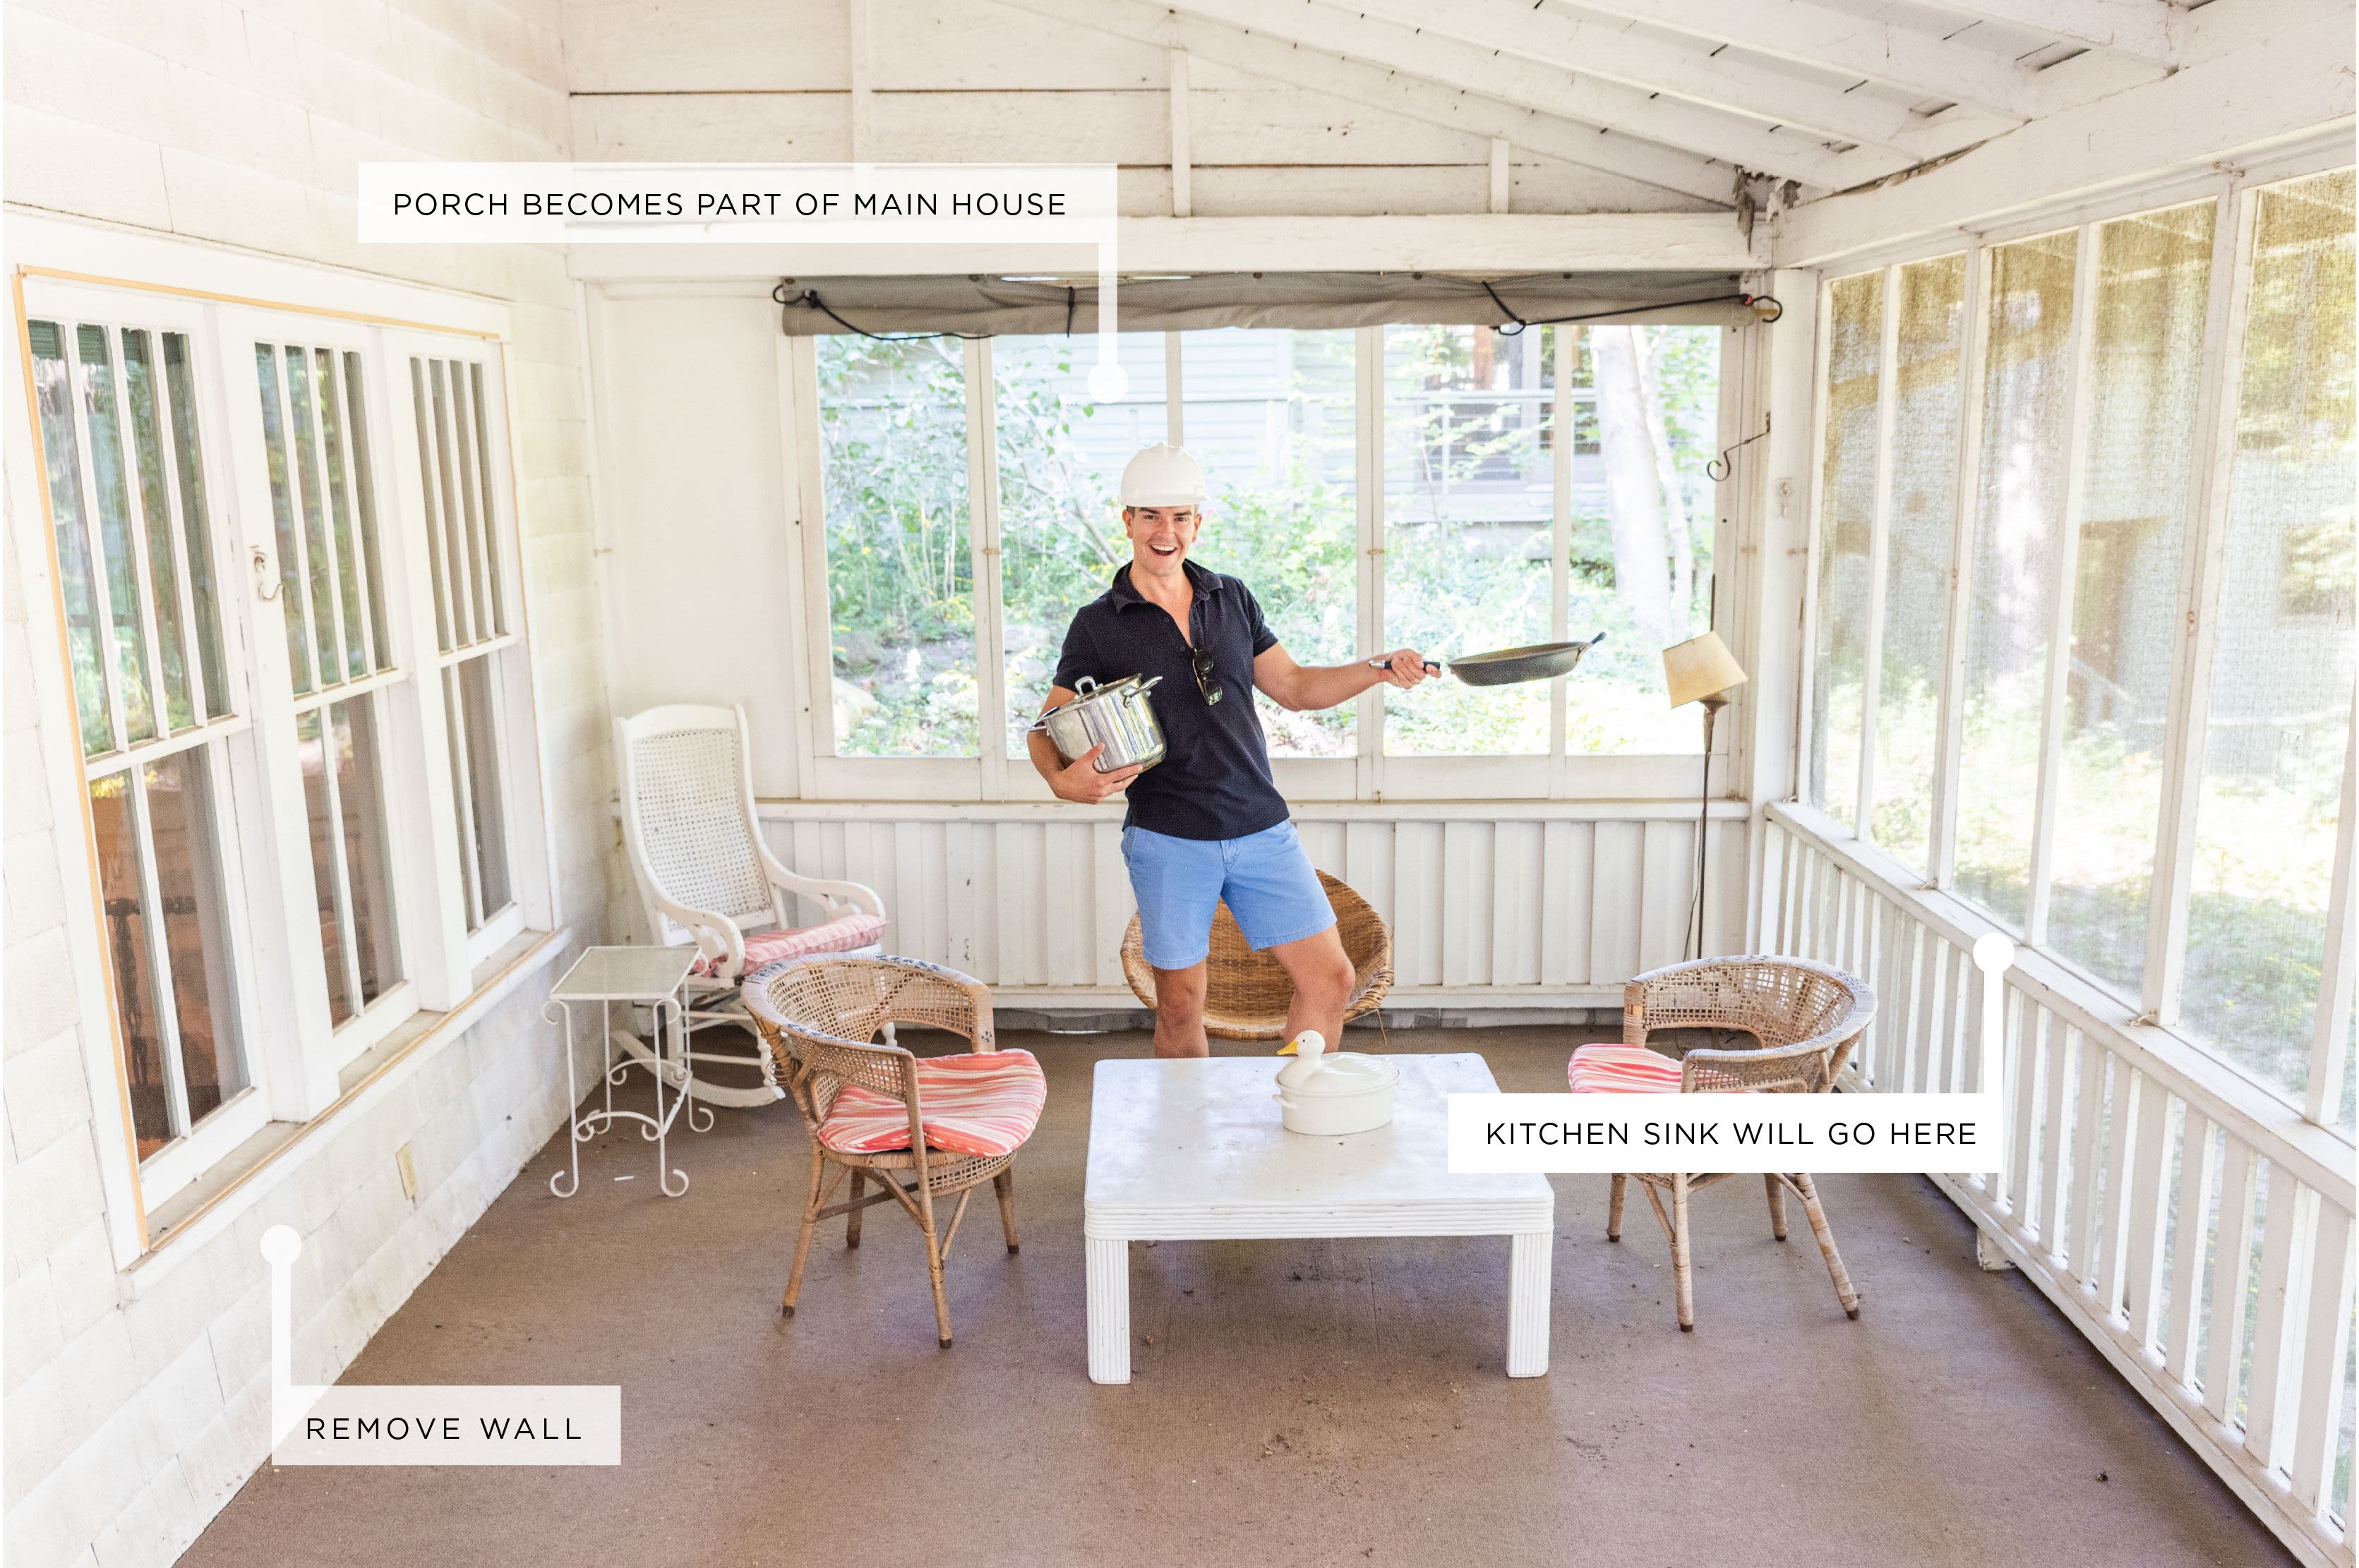
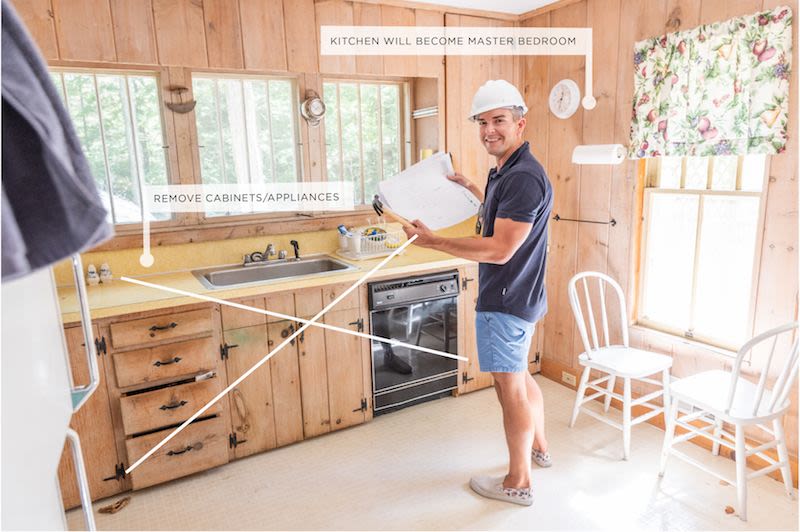
The former kitchen is well on it’s way to becoming mine and Jeff’s master bedroom...
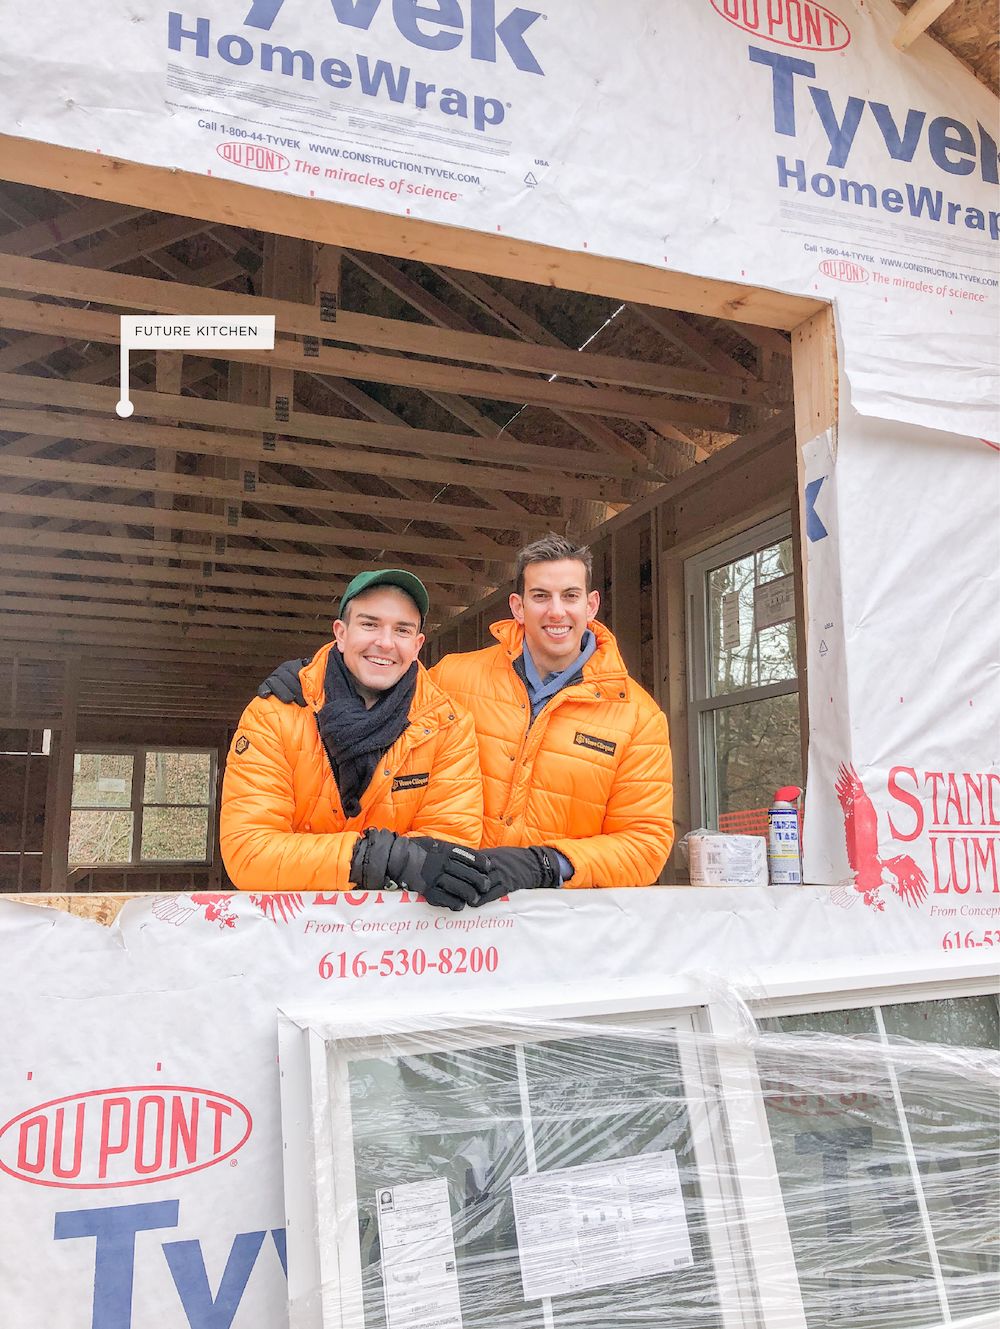
..and the new kitchen has beautiful windows that are sure to bring in a lot of natural light for all of to enjoy.
Heading back outside, we changed the pitch of the roof and have made big strides in changes to the lower level.
UP NEXT, PHASE 2 ½:
To preface, everything I’m about to list technically still falls under Phase 2, which is everything that falls under the ‘construction’ umbrella. And although the following is categorized as things that don’t move, I feel that they deserve their own sub-category because they are much more fun! Up next:
Finishes: Tile, countertops, wall paneling details, and paint selections. Flooring is also selected but installed as late as possible in the renovation process, so not to incur any damage.
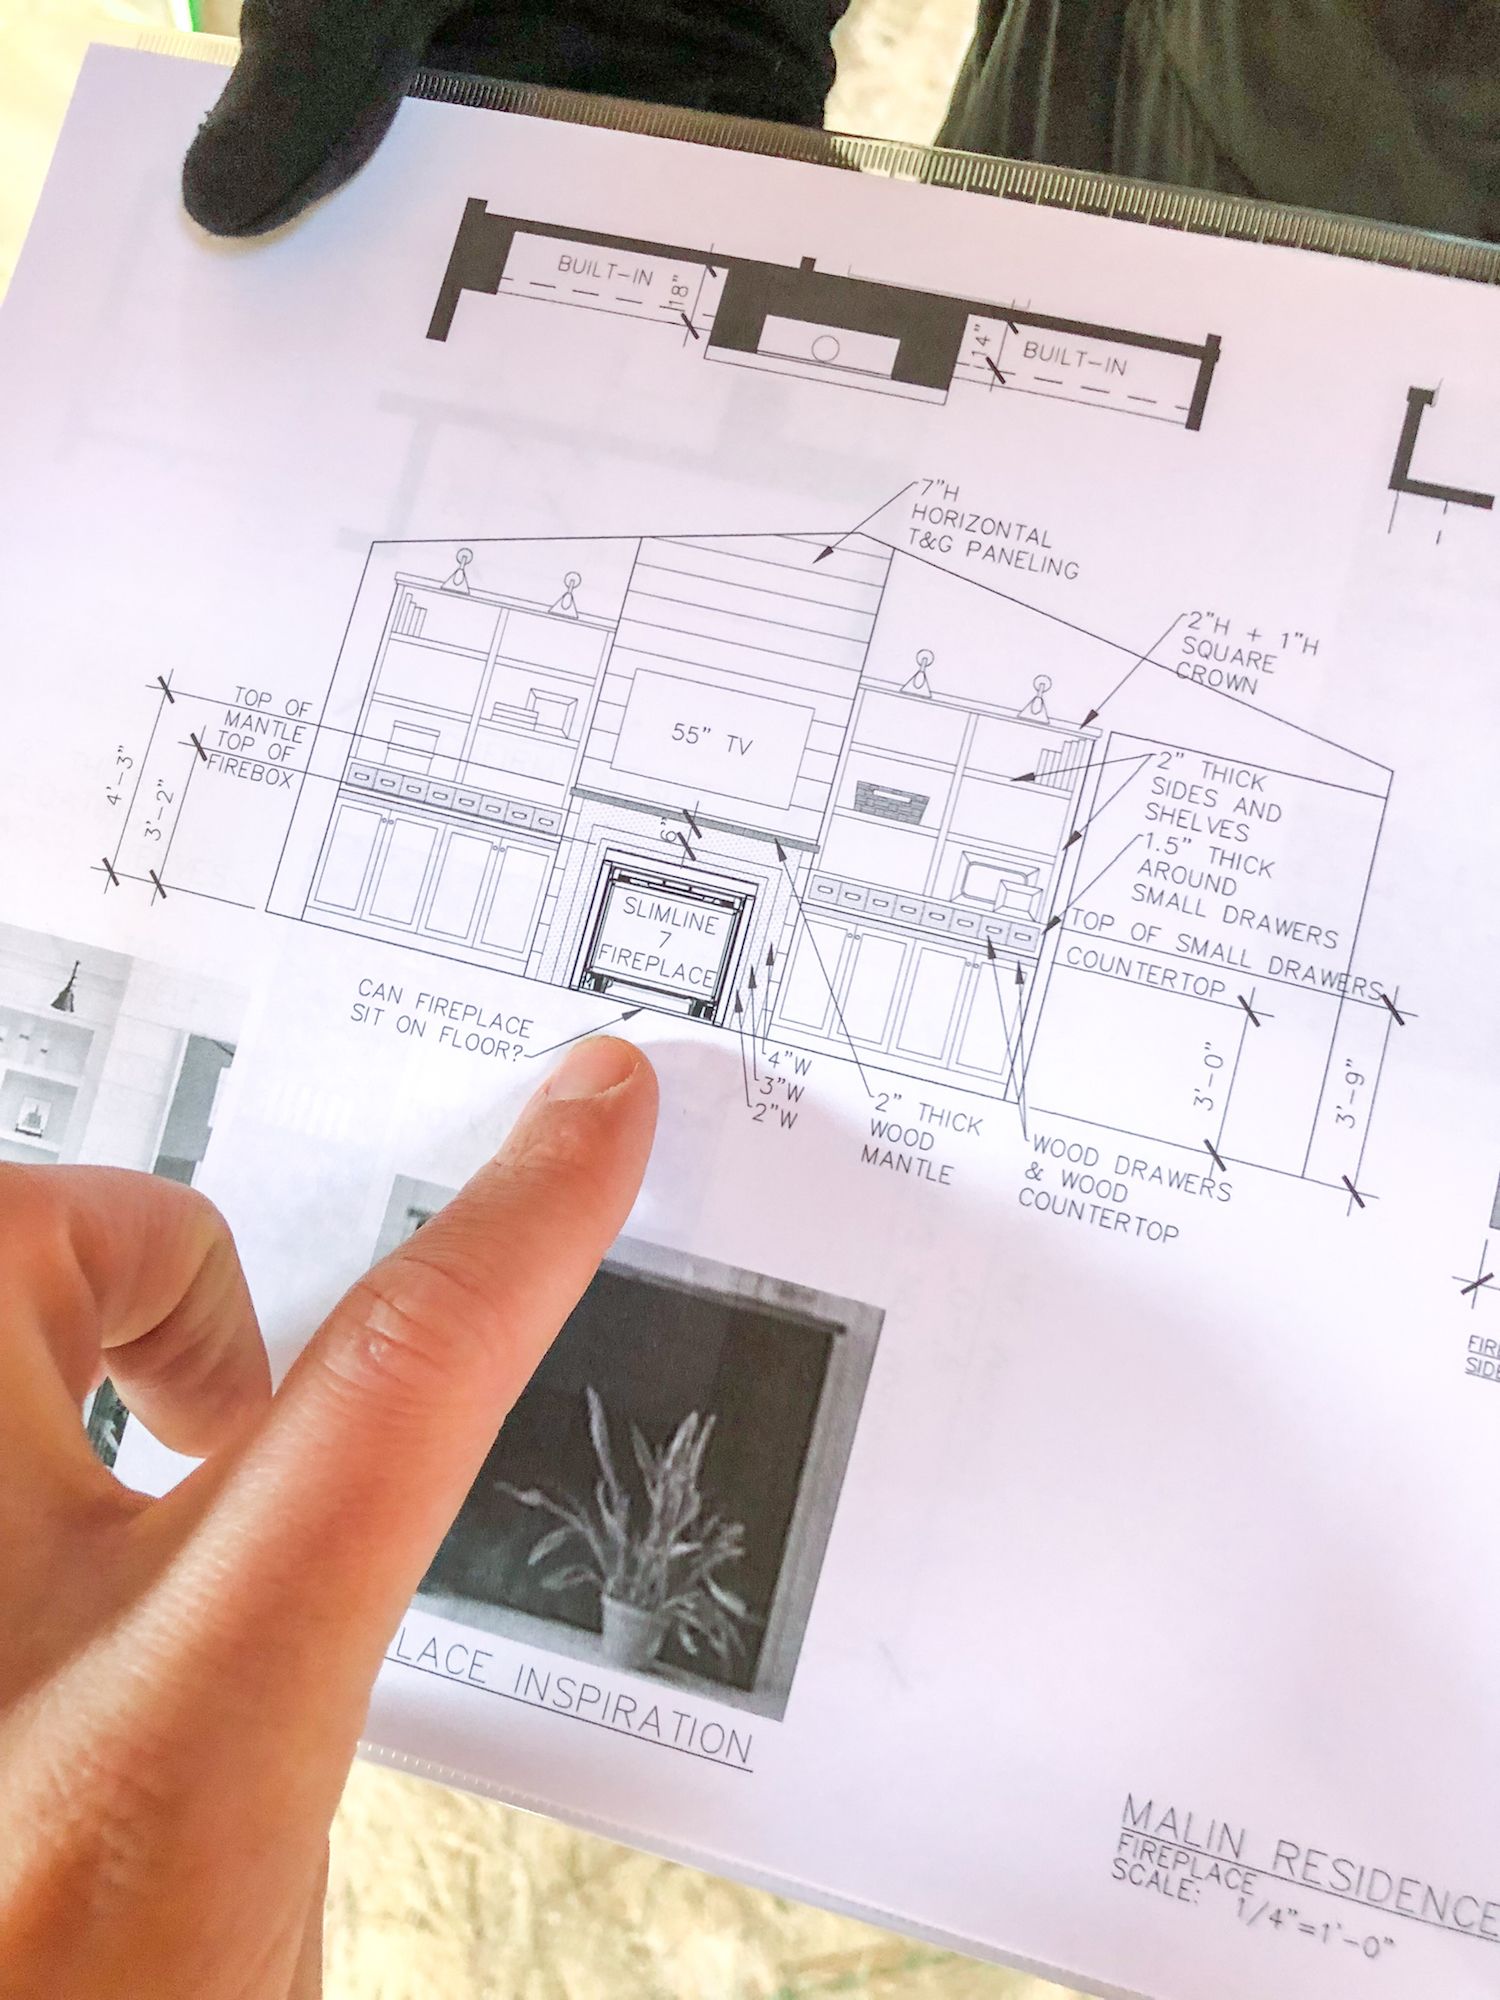
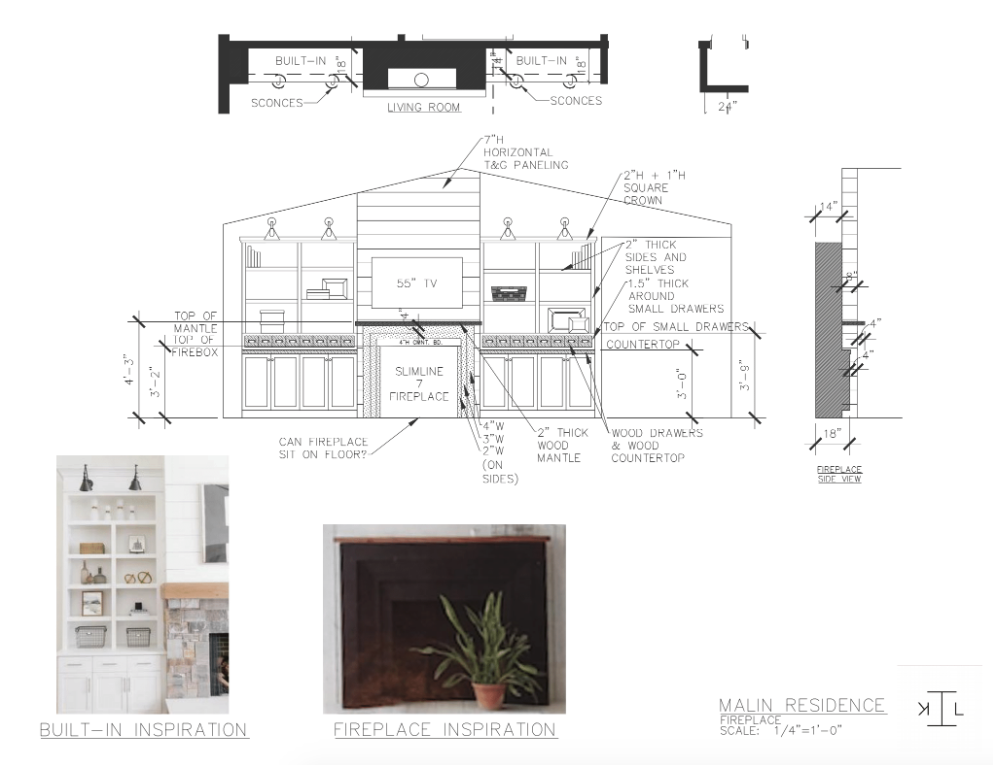
Finish Carpentry: Cabinetry, baseboards, molding, trim around windows and doors, built-in elements such as bookcases, breakfast nooks, and in our particular case, a very cool new fireplace.
Lighting, Hardware & Bathroom Mirrors: We selected all of these items early on, to ensure all drawings and elevations are accurate. This means all sconce heights are called out, mirror sizing is shown, and unique hardware is placed. Again, accurate elevations and drawings are critical when you and your design team are so far away!
I will be heading back to Lake Michigan in a few weeks to review the progress since November. In the meantime, though, I’m excited to give you a sneak peek into what we’re planning for the (more) fun part in Phase 2.
.jpg-jEDptQg)
If you have been following me for a while, especially when it comes to reveals of my home, then you’re already aware of my fondness for navy, white, and coral in my interior decor. What can I say? I’m a creature of habit, however, I have had so much fun mixing things up with Kate. In comparison to moving into a house that’s more or less turnkey, the renovation process brings so many decisions your way. You really have to think big picture and long-term, so that has been an exciting, as well as a challenging process.
Below, Kate gives you guys a sneak peek into our preliminary design concepts for Phase 2 of the following areas.
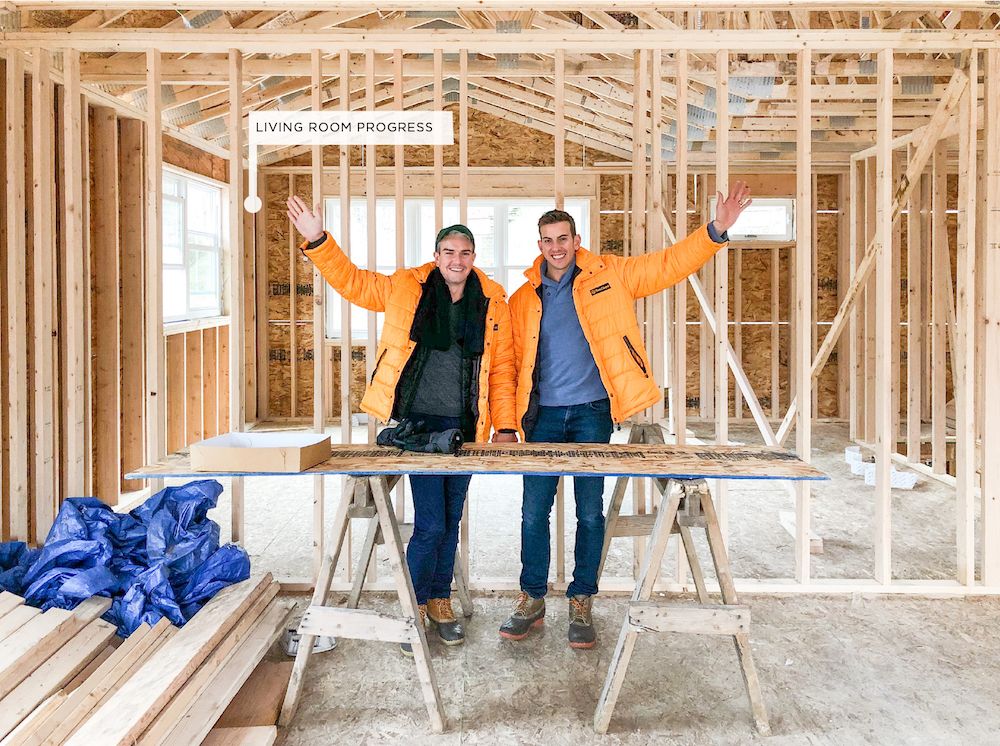
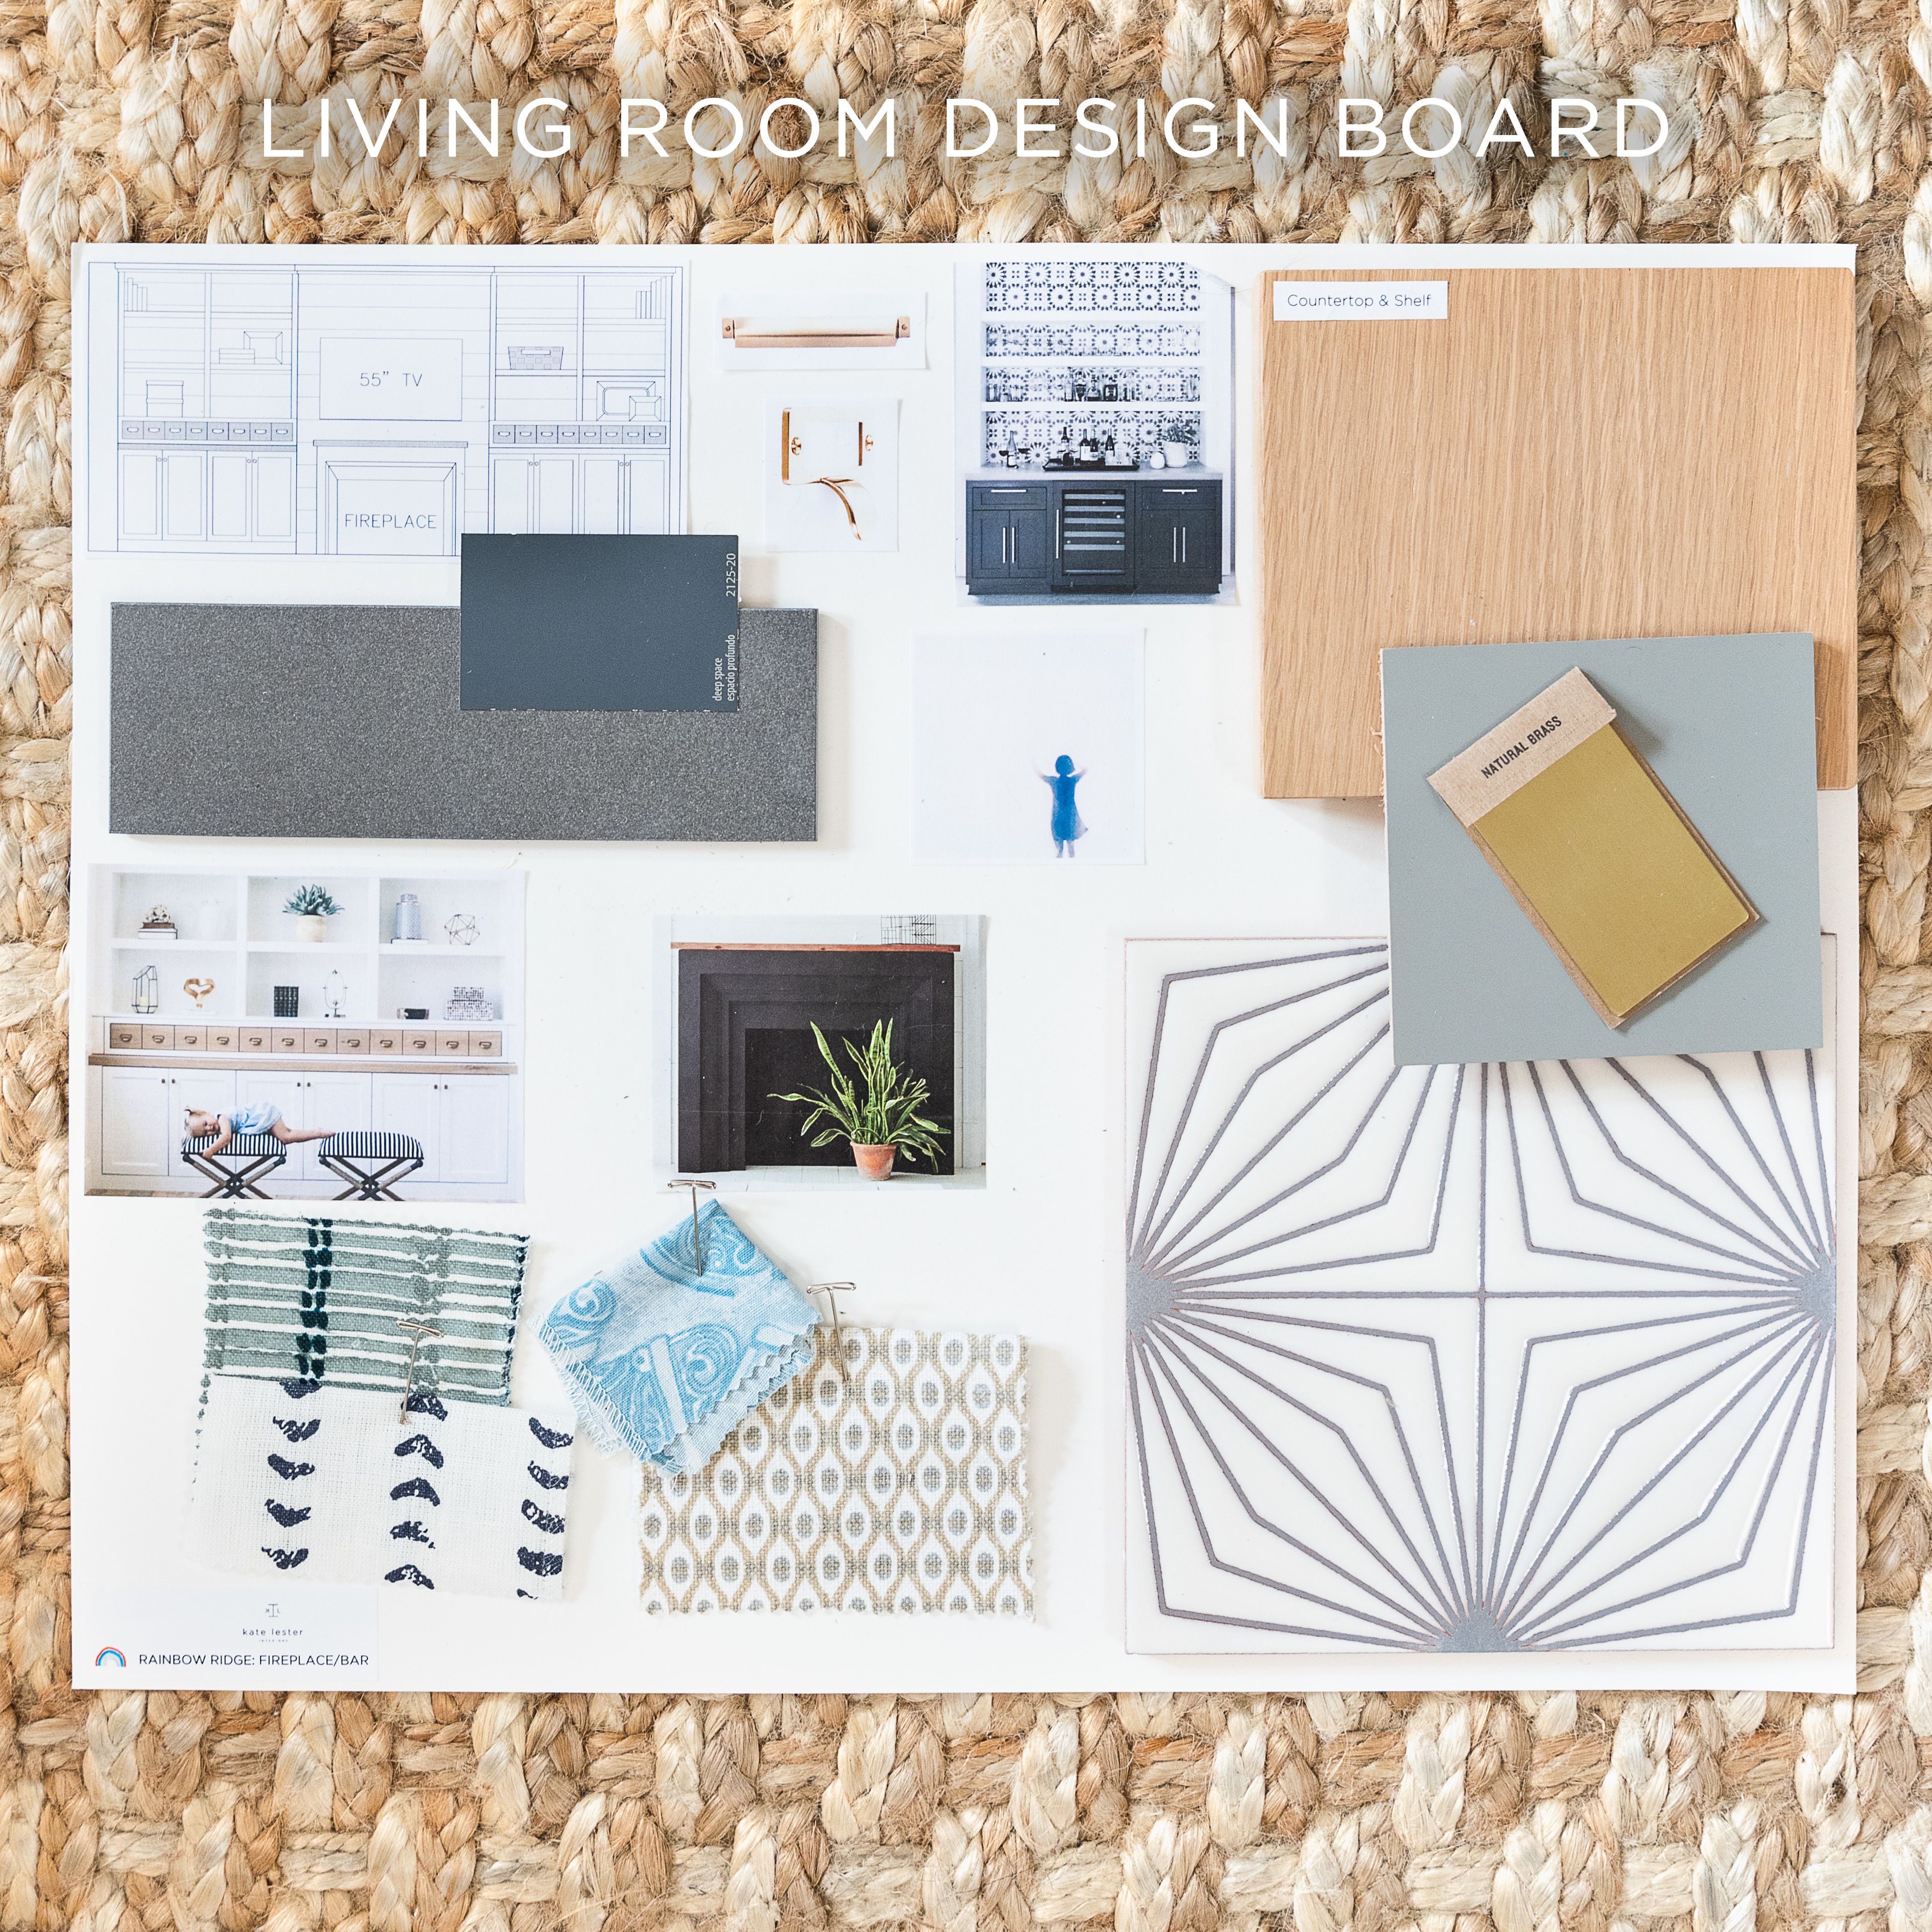
THE LIVING ROOM
Here we really wanted to create a sense of drama and “wow factor”. In a living area, it’s important for the fireplace wall to be a focal point, so we designed custom bookcases and added shiplap paneling to compliment the t&g paneling on the ceiling throughout. We also designed a custom fireplace surround detail, which we will be painting a deep blue/black hue for dramatic impact, and to anchor the firebox. Because the living room also has a built in bar area, we picked a really chic patterned tile from Fireclay Tile for the backsplash wall and added floating shelves for art decorative accessories. This space already feels SO FAB and we haven’t even infused the furnishings yet!
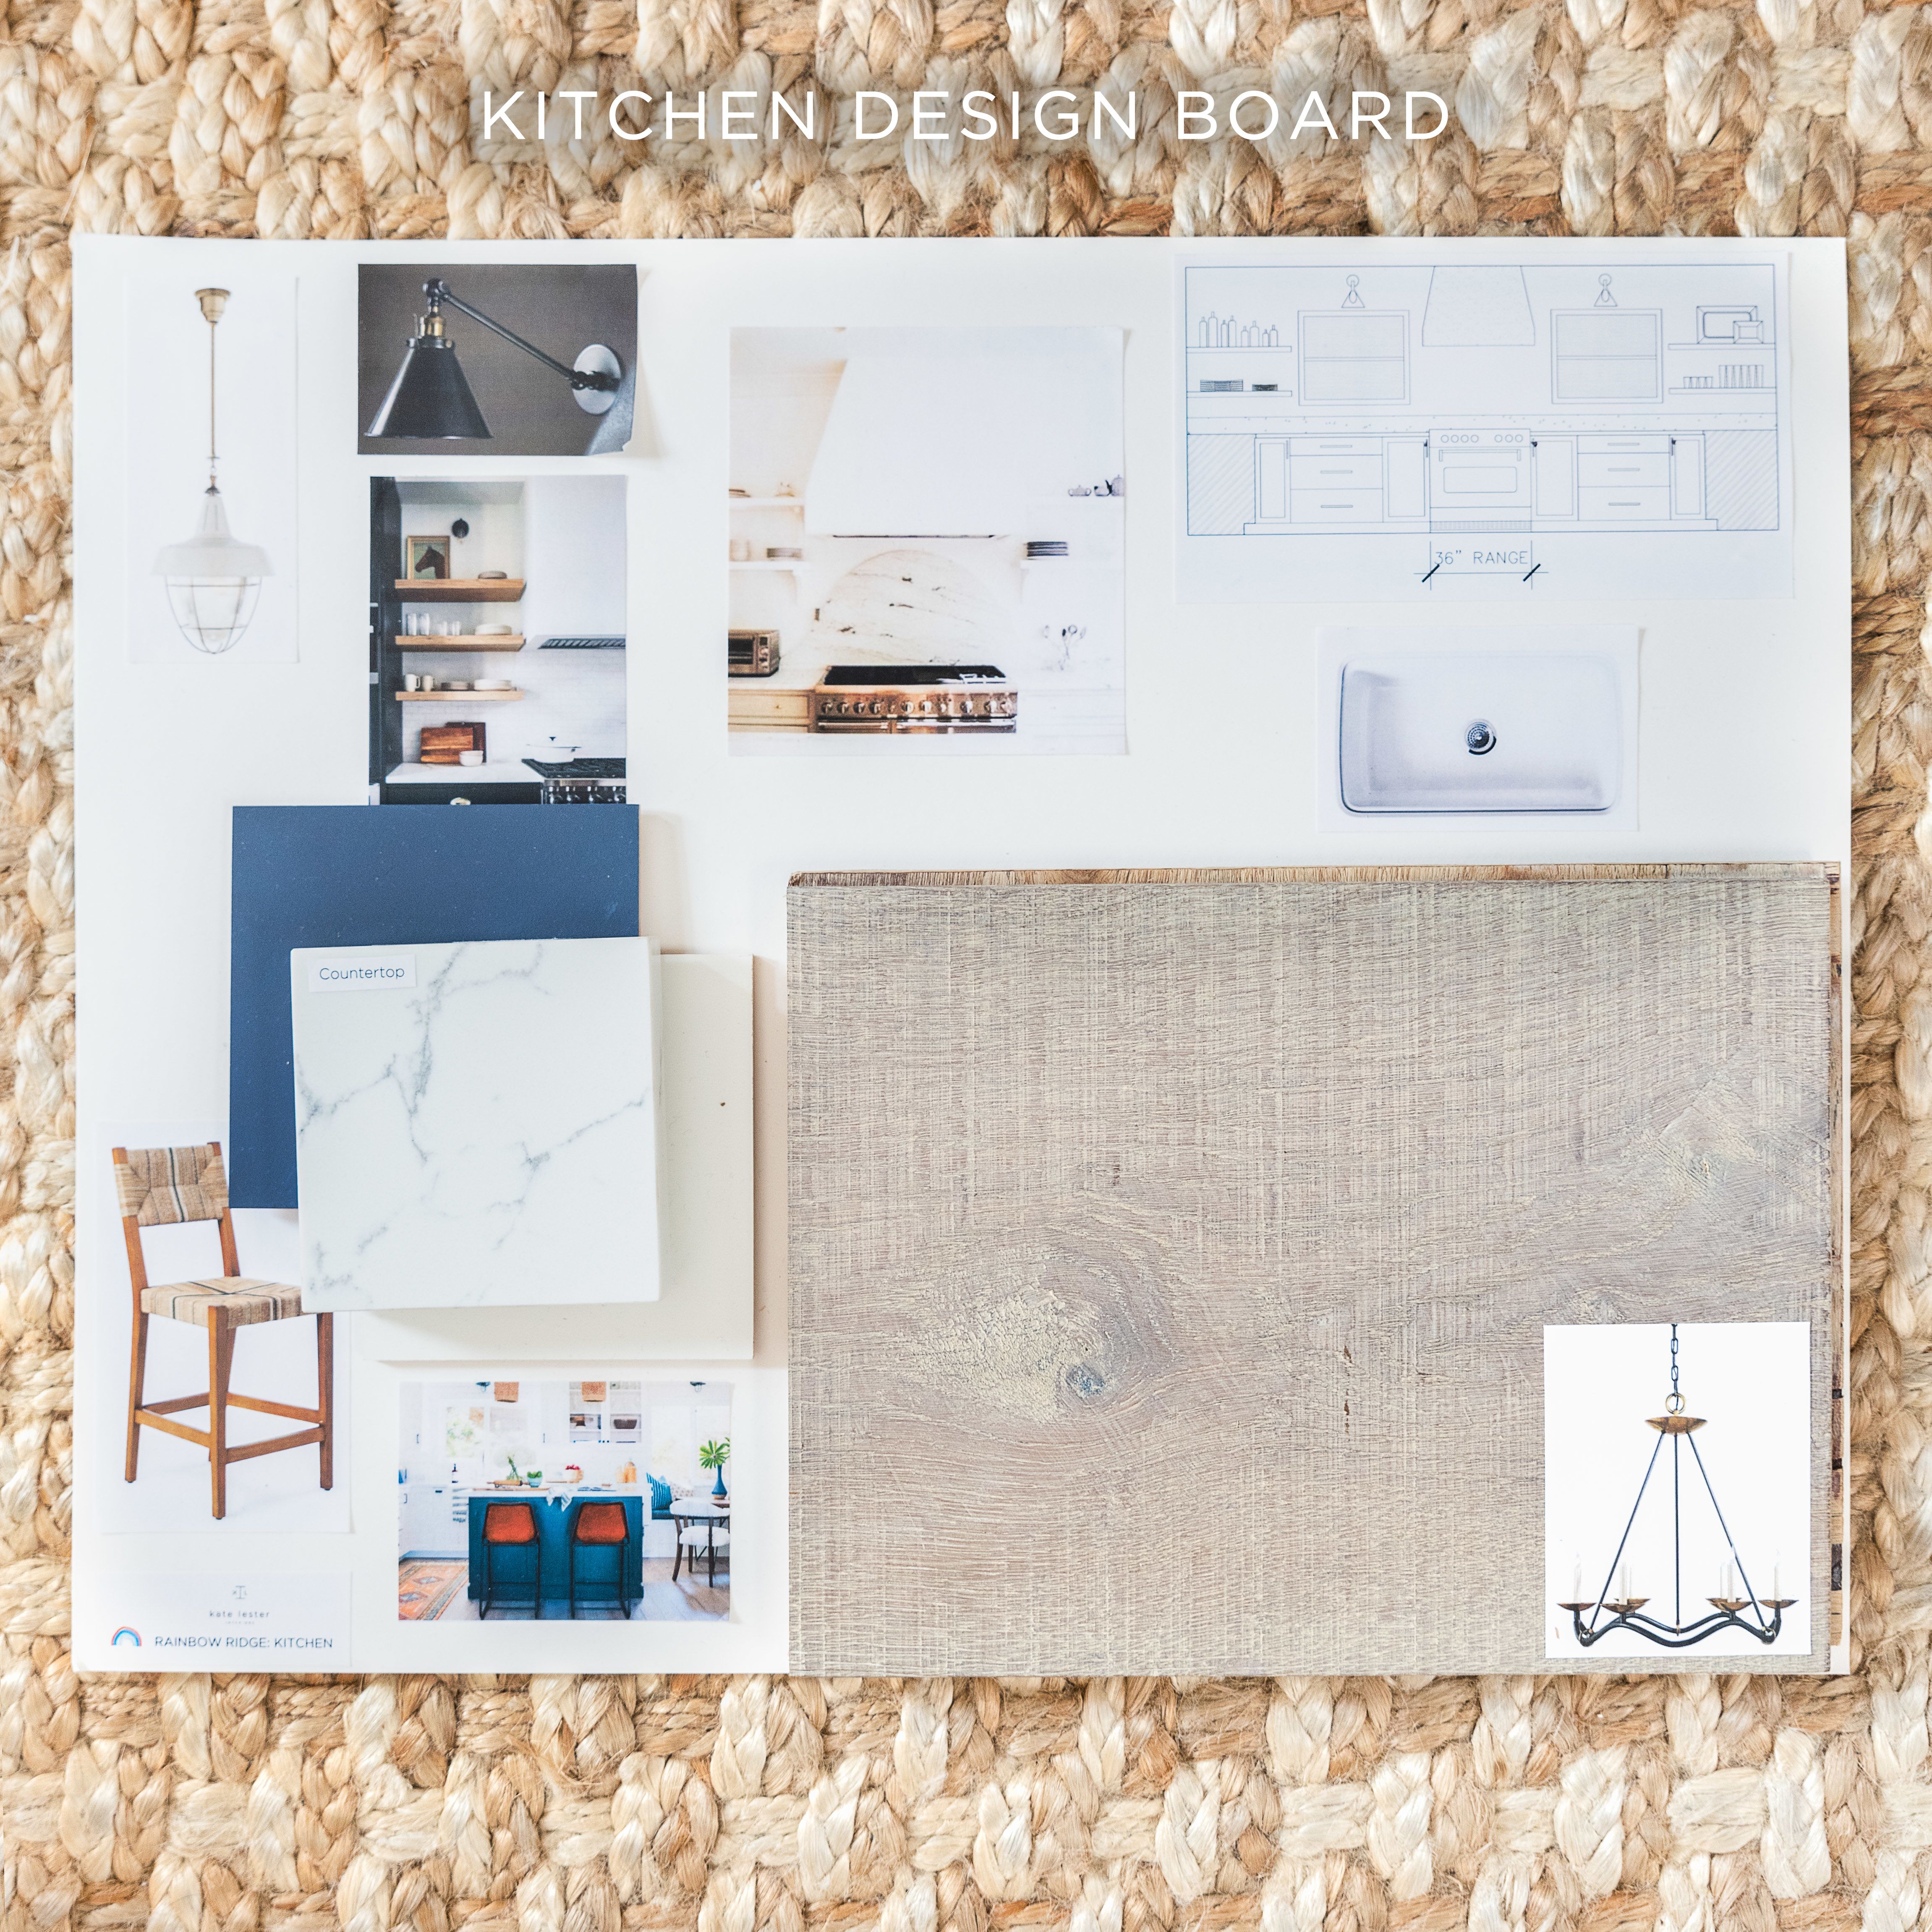
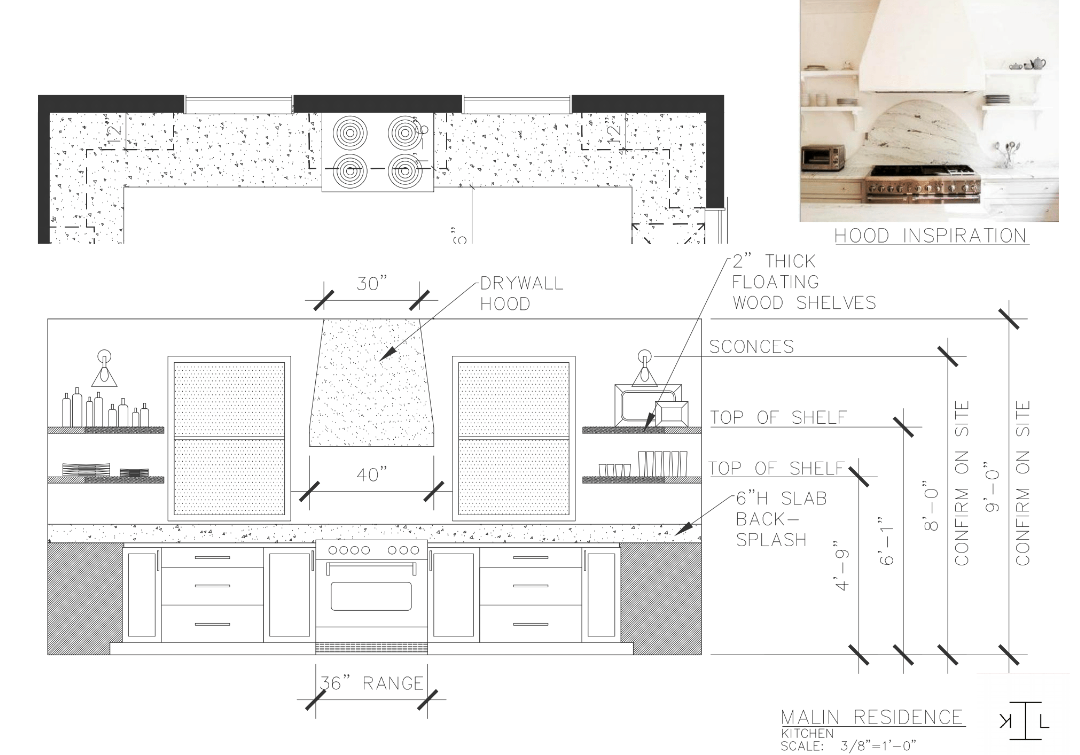
THE KITCHEN
Since this house has an open floor plan concept it’s imperative that all of the finishes be selected and laid out together. (No designing in a vacuum!) We carried over more of the gray and white tones, as well as adding in a pop of navy for the kitchen island. In lieu of traditional upper cabinets flanking the kitchen windows, we again opted for open shelving and added vintage-inspired sconces. A custom-designed plaster hood anchors the window wall but still feels bright and fresh.
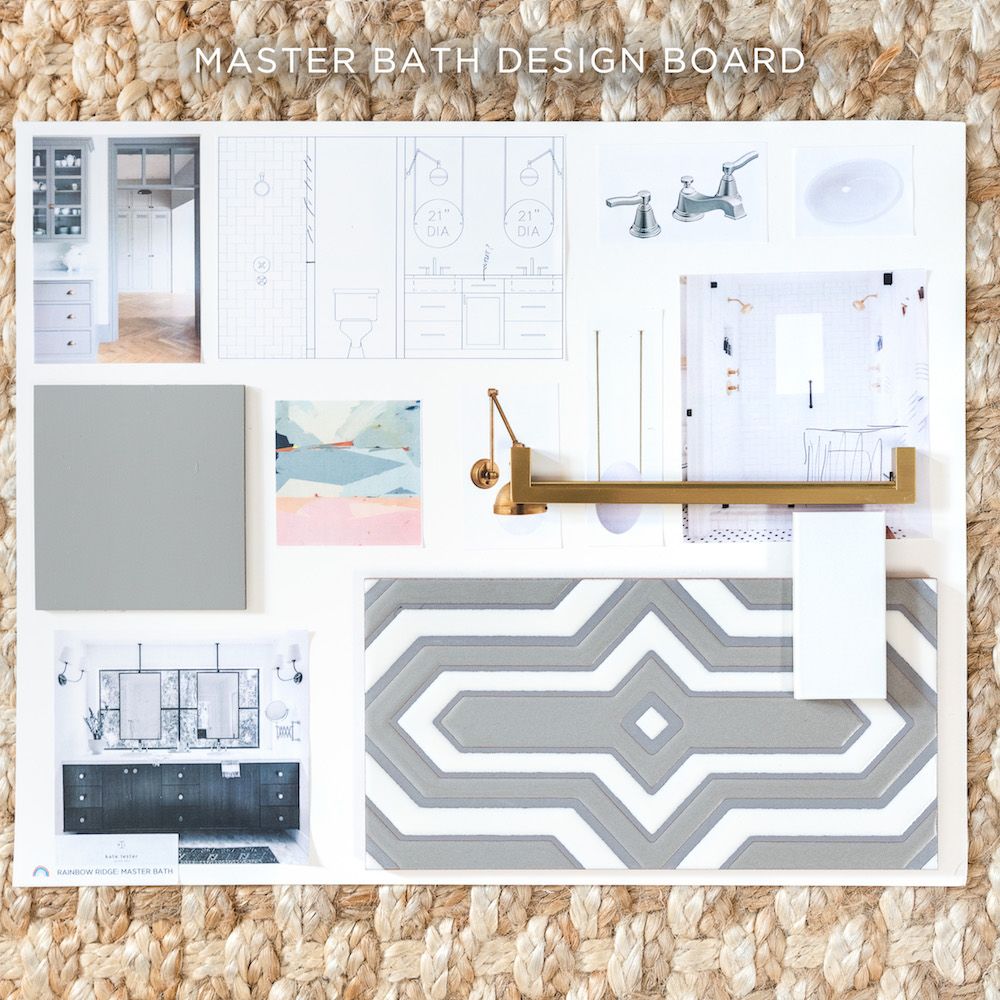
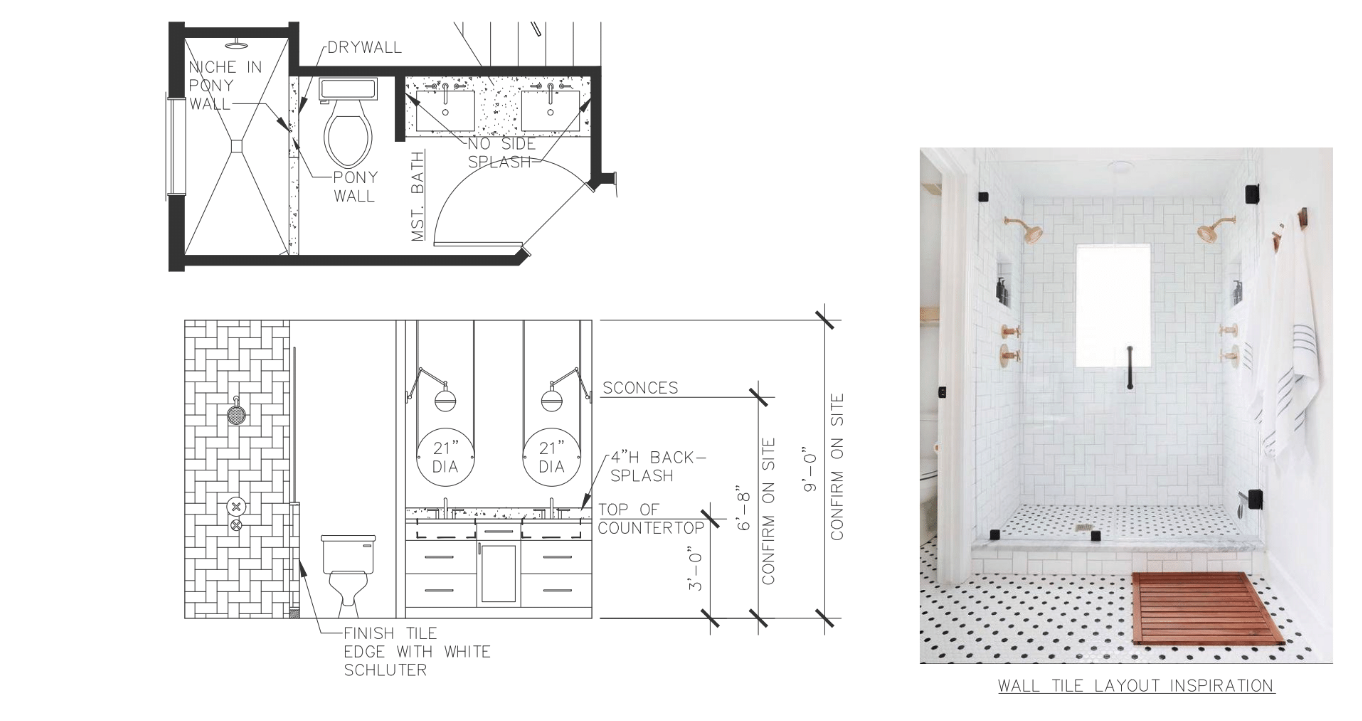
THE MASTER BATH
In the master bath, another amazing patterned tile from Fireclay is a showstopper and will serve as the floor tile throughout. Simple shaker-style cabinets anchor the space, and brass accents and unique ceiling-hung mirrors and wall sconces infuse a bit of glam and will definitely be a conversation starter!
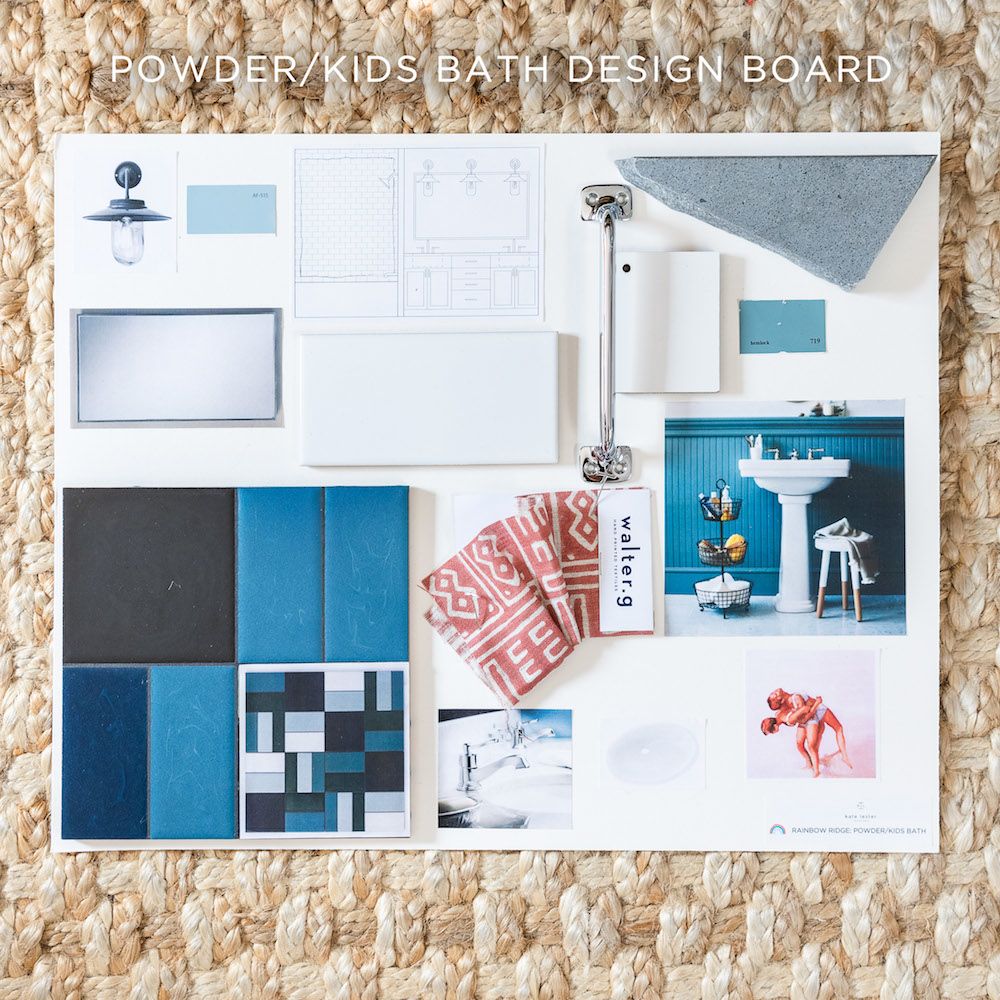
THE POWDER/KIDS BATH
I am not going to lie that this might be my favorite bathroom. Um, hello can we talk about that Fireclay floor tile, with the concrete-inspired countertop?! We’re custom-coloring the floor tiles, so stay tuned to see how fab this is going to be paired with vintage sconces from kate lester HOME, and the blue beadboard wall paneling. This one is sure to be gorge.

Thanks, Kate! Well, what do you all think? I’m especially excited about the powder/kids bathroom design. I think it’s going to turn out so cute! I’m also very excited about it all, in general. We’re building a home that is sure to house so many loving memories. I can hardly wait!
Stay tuned…
Cheers
Xx Gray